
Navigate
Products
Download
eShop
Upgrade
About
Training
Support

Navigate
Products
Download
eShop
Upgrade
About
Training
Support
This tutorial explains how to create a simple cross stitch design on blank background in Embird Cross Stitch plug-in. Design is digitized so that user puts pixels into a grid on Work Area. When finished, each pixel is compiled into cross and the design is launched into Embird Editor for final adjustment and save in desired embroidery format. Although it is not shown in the following tutorial, it is possible to import image or chart into the background of Work Area - these topics are explained in Embird Cross Stitch - Set Size of Image and Embird Cross Stitch - Importing Chart tutorials.
1 - Run Embird and click "Editor" menu to switch to Editor window.
2 - Select "Insert > Cross Stitch Design" menu to open Embird Cross Stitch window.
3 - The Cross Stitch plug-in will be launched, and its "Preferences" box will appear on the screen (Picture No. 1). Specify the cross size and the size of Work Area. In this example, the cross size is 2.0 mm (i.e. there will be 5 crosses per centimeter), and the size of Work Area is 30 x 30 crosses - this means that the design we'll create will fit the 60 x 60 mm hoop size.Confirm these settings by clicking "OK" button.
1. Set size of Work Area

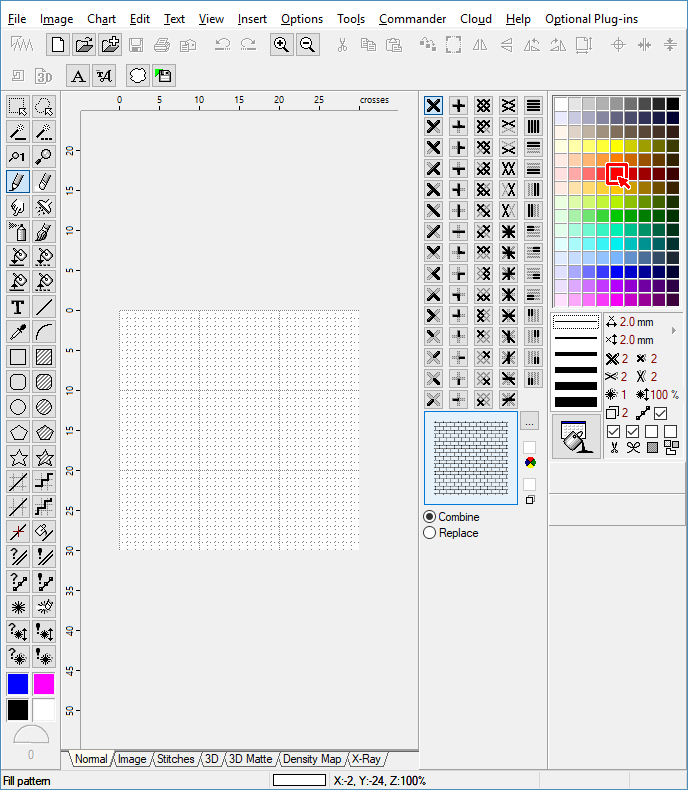
4 - Embird will adjust the size of Work Area to 30 x 30 crosses (Picture No. 2). Now we can start using Cross Stitch tools for drawing our simple design - "two cherries". Select the red color from the palette at the right side of the screen: Move mouse pointer to the box containing the red color and click the left mouse button to set this color as default "cross color 1". This means, that the left mouse button will draw crosses on Work Area having this color. If you select a color in palette with right mouse button click, this will set the color as default "cross color 2" for drawing with right mouse button on Work Area.
2. Select red color as default Cross Color 1
5 - Move mouse pointer to the icon of "Filled Ellipse" tool  at
the left side of the screen and click the left mouse button to select this tool. Move mouse pointer to the Work Area,
depress left mouse button and drag mouse to draw ellipse (circle). Release left mouse button when you have the desired
shape and size (Picture No. 3).
at
the left side of the screen and click the left mouse button to select this tool. Move mouse pointer to the Work Area,
depress left mouse button and drag mouse to draw ellipse (circle). Release left mouse button when you have the desired
shape and size (Picture No. 3).
Note: More information about tools is available in Embird Cross Stitch - Design Toolbar tutorial. Before you start drawing crosses on Work Area, you might want to change the cross type - normal, upright, mini, horizontal or vertical. Find more information in Embird Cross Stitch - Color Palette Bar tutorial.
3. Draw two red filled circles

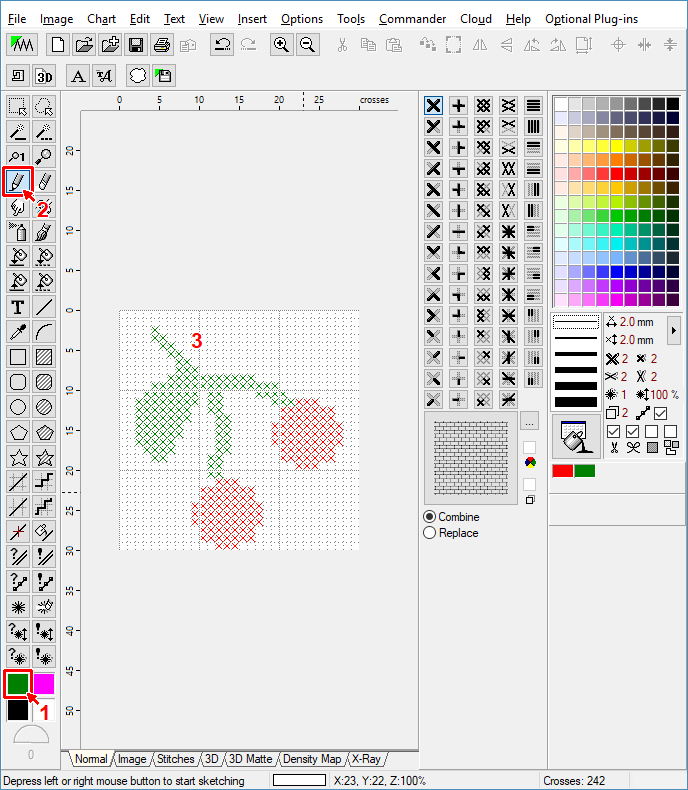
6 - Select green color from the palette at the right side of the screen. For drawing of leafs, select
"Pencil" tool  at the left side of the screen. Move mouse pointer to the Work Area and draw the leafs (Picture
No. 4).
at the left side of the screen. Move mouse pointer to the Work Area and draw the leafs (Picture
No. 4).
Tip: If you make a mistake, you can delete the unwanted cross by "Eraser" tool  .
Another way which does not require the change of active tool is to depress ALT key on the keyboard and click the
unwanted cross while holding this key down.
.
Another way which does not require the change of active tool is to depress ALT key on the keyboard and click the
unwanted cross while holding this key down.
4. Draw green leafs using Pen tool
7 - Add the outlines to the design automatically by selecting "Insert > Insert Outline Around Each Color (Multi-Color)" command from the main menu (Picture No. 5).
Tip: It is possible to create outlines, or back stitch lines also manually. Find more information about the tools allowing these operations in Embird Cross Stitch - Design Toolbar tutorial.
5. Add outlines to both colors

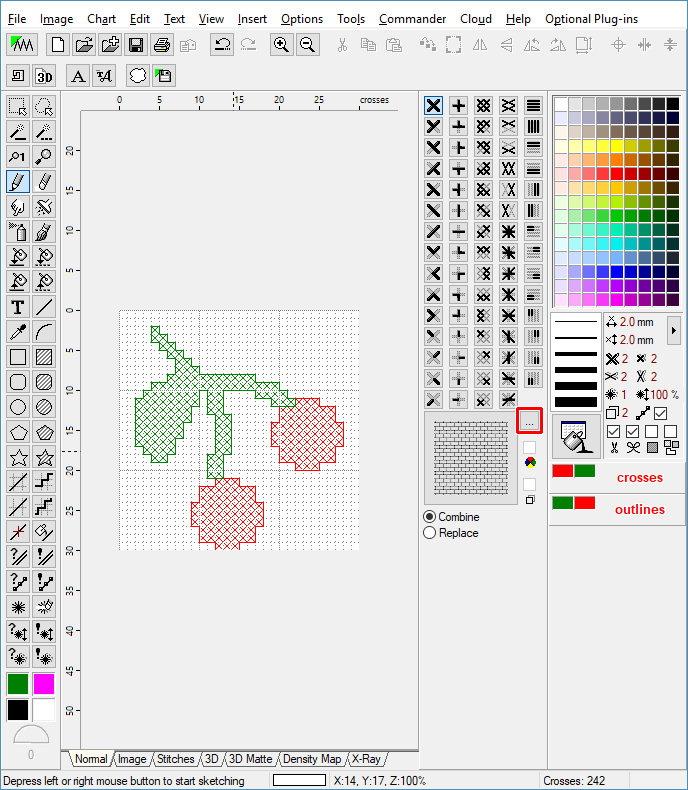
8 - Check the designs with outlines (Picture No. 6). Now we would like to fill the background of the design with some pattern. Click the "Choose fill pattern" (...) button at the right side of the screen.
6. Click "Choose fill pattern" button
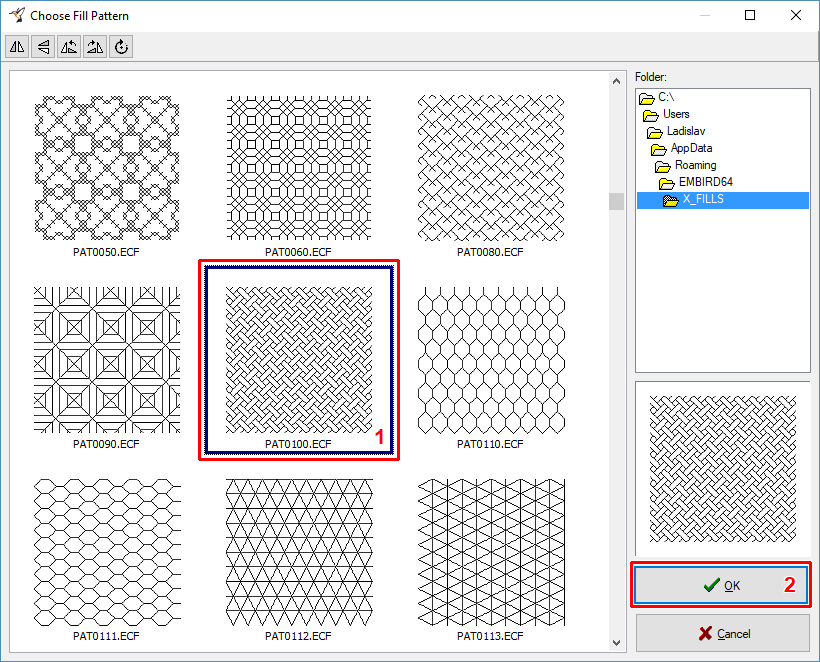
9 - A dialog box will appear on the screen, allowing you to choose the fill pattern. Scroll the window down and choose some pattern (Picture No. 7). Click "OK" button to confirm the selection.
Tip: You can create you own fill patterns - find more details in Embird Cross Stitch - Creating New Fill Pattern tutorial.
7. Choose fill pattern
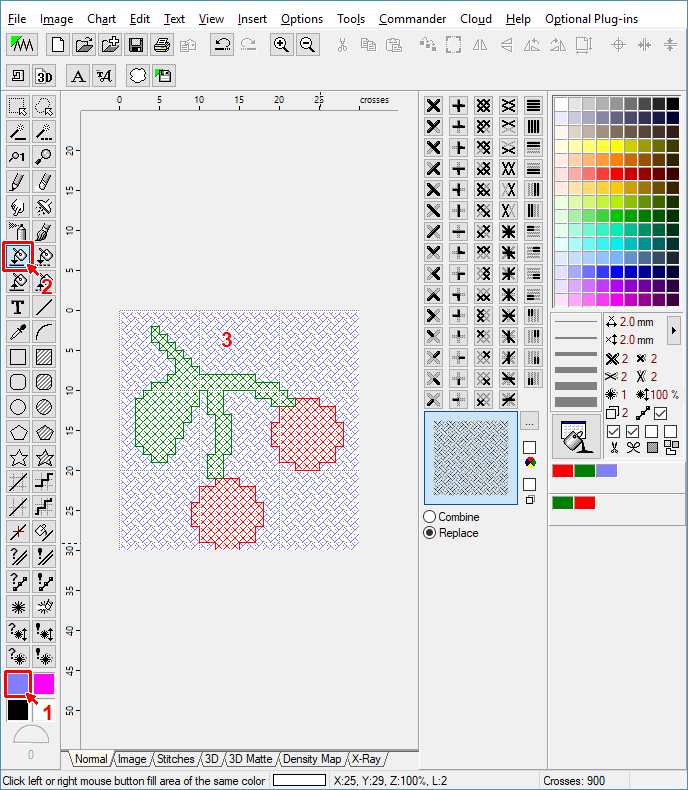
10 - Select light blue color in the color palette (1 in Picture No. 8). Select "Fill contiguous area" tool  at the left side of the screen (2).
11 - Move mouse pointer to the Work Area and position the cursor anywhere over the blank space (3). Click left mouse button to fill this area with selected pattern and color (Picture No. 8).
Note: If you don't select any pattern, the area will be filled with crosses of currently chosen type (normal, upright, mini, horizontal or vertical).
Tip: You can fill in areas by applying gradient and filter to the fill pattern - click "Fill
Properties" button  at the right side of the screen to access these options.
8. Fill background with chosen pattern
12 - Check the 3D preview of design by clicking the "3D" tab below the Work Area (Picture No. 9).
9. Check design in 3D view mode
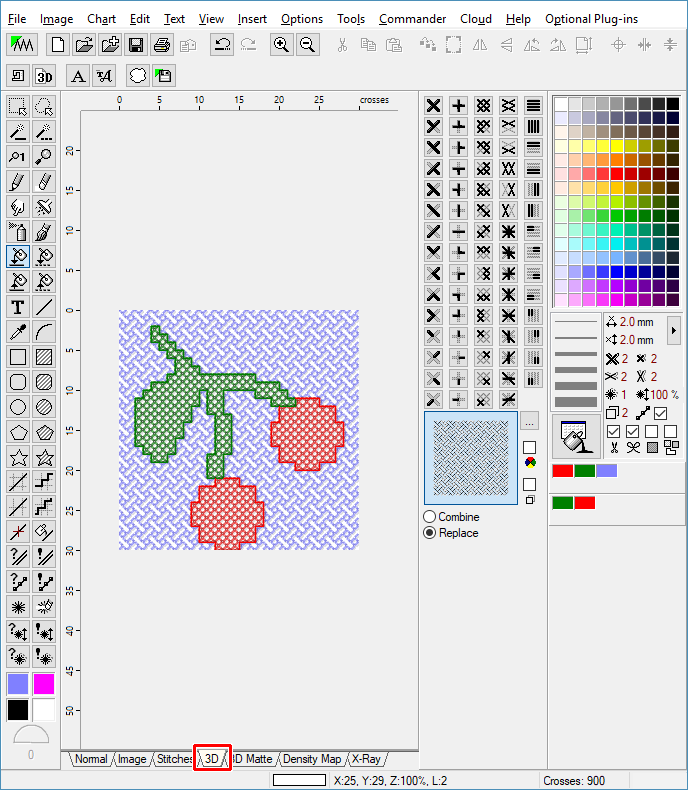
Tip: Select "View > Sew Simulator" command from the main menu to check the simulation of sewing of the design.
13 - Click "File > Save As" menu to save this cross stitch project into a file on your hard disk. Specify the file name and location in the dialog box which appears on the screen.
14 - Click "File > Compile and Put into Embird Editor" menu to compile the cross stitch project into stitches and return back to Editor window.