Navigate
Products
Download
eShop
Upgrade
About
Training
Support

Navigate
Products
Download
eShop
Upgrade
About
Training
Support
1 - Run Embird and click "Editor" menu to switch to Editor window.
2 - Select "Insert > Cross Stitch Design" menu to open Embird Cross Stitch window.
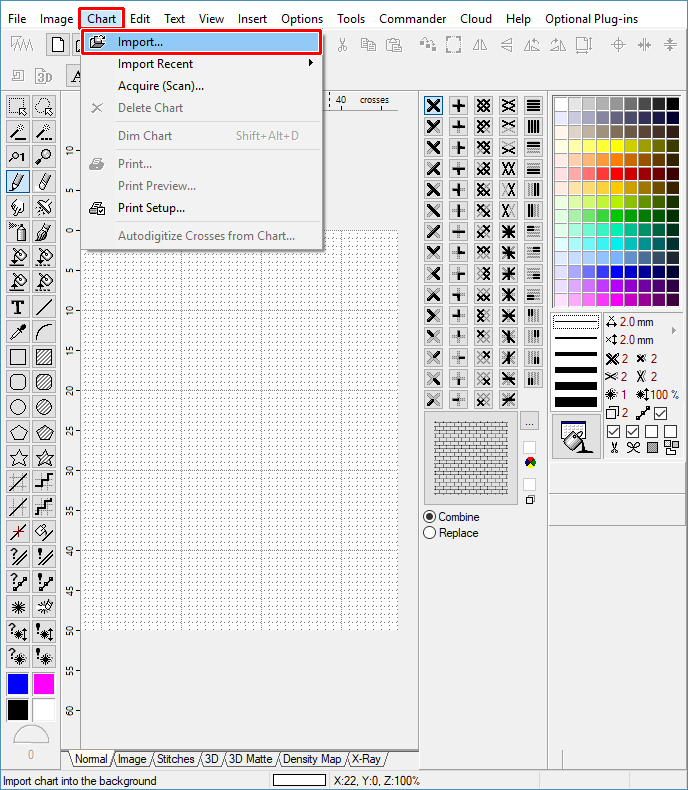
3 - In Embird Cross Stitch window select "Chart > Import" menu (Picture No. 1).
1. Select "Chart > Import" menu
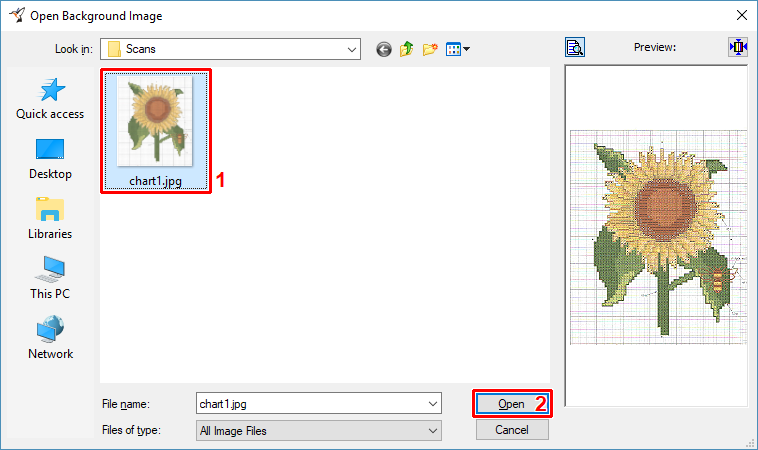
4 - A dialog box will appear on the screen allowing you to choose the file containing scanned image of chart. Browse to the folder with scanned chart, select it (1 in Picture No. 2) and click "Open" button (2) to open the scanned chart.
2. Open file containing scanned chart
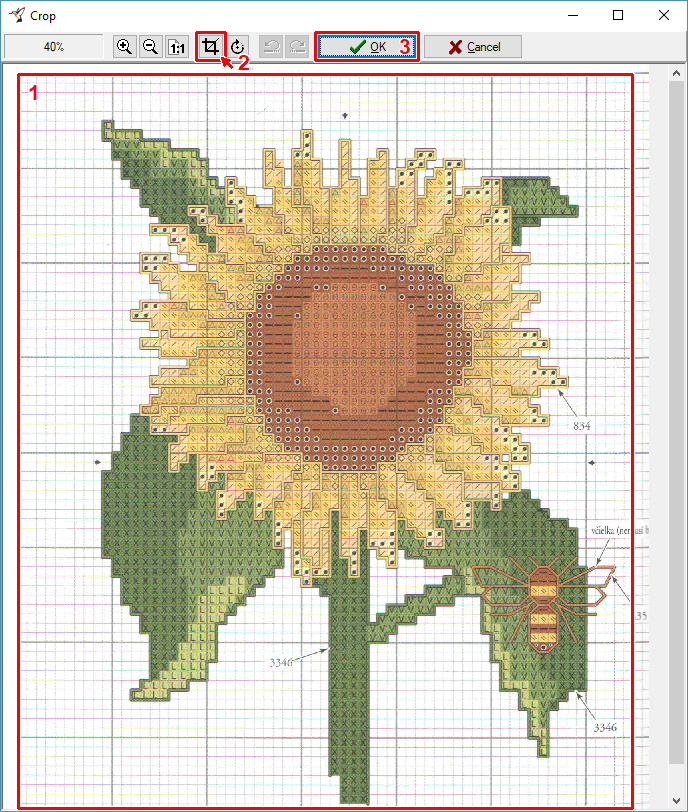
5 - Crop scanned chart. Move mouse pointer to the left-top corner, depress left mouse button and drag mouse cursor to the right-bottom corner. Release left mouse button there. Check the crop rectangle, it is possible to move its edges to make it accurate (1 in Picture No. 3). Then click "Crop" button (2). Finally, click "OK" button to continue (3).
3. Crop imported image
6 - Another dialog box will appear on the screen, displaying the chosen chart and allowing to calibrate it for use in Cross Stitch. Notice the three connected red marks in the top left corner of the chart (Picture No. 4).
4. Grid calibration window
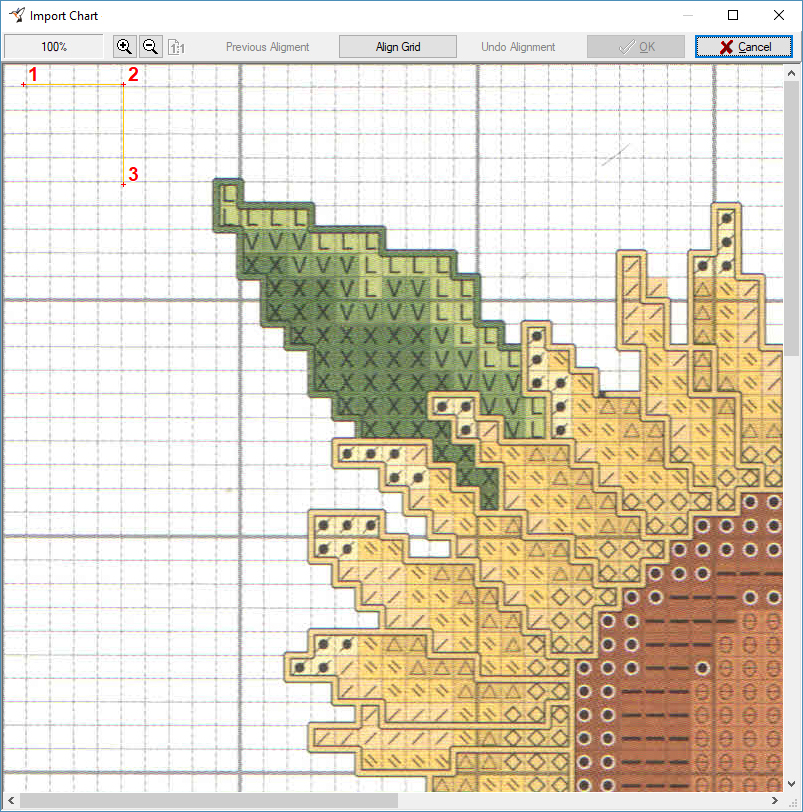
7 - Position mark 1 to the upper left corner of the ten square grid, position mark 2 to the upper right corner of the ten square grid and position mark 3 to the bottom right corner of the ten square grid (Picture No. 5). To change the position of some mark, move the mouse pointer to its handle square, depress the left mouse button and drag mouse while holding the left mouse button down. Release left mouse button when the mark is on the right position.
5. Move three marks to align chart
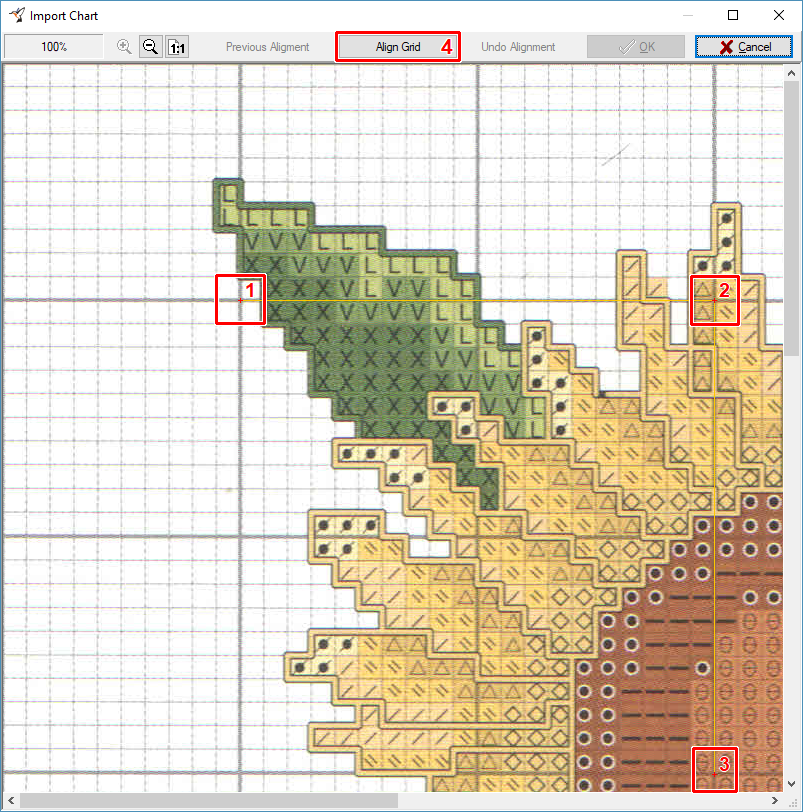
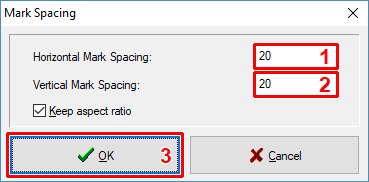
8 - Click "Align Grid" button in the bar at the top of the window. Specify the horizontal and vertical mark spacing in the dialog box which appears on the screen (Picture No. 6). As you can see in Picture No. 4 above, in this example the horizontal mark spacing is 20 squares (1) and vertical mark spacing is also 20 squares (2). Hit "OK" button (3) to continue with grid aligning.
6. Specify spacing defined by calibration marks
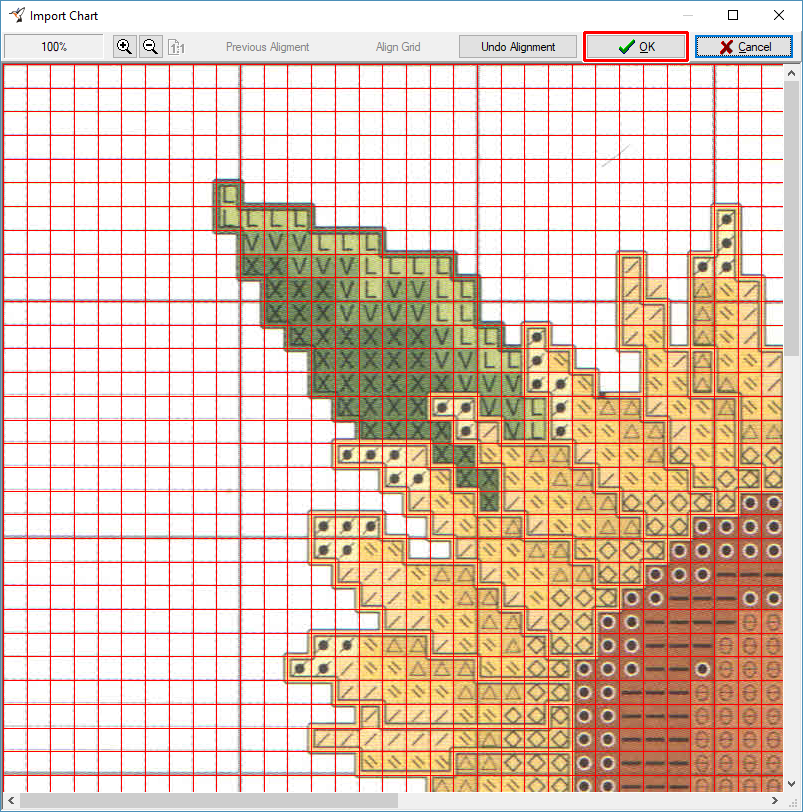
9 - Check the results of alignment (Picture No. 7). In case the red grid follows the scanned chart grid, click "OK" button to insert the aligned chart into the Cross Stitch work area. Otherwise click "Undo Alignment" button to revise the position of red marks.
7. Check aligned chart
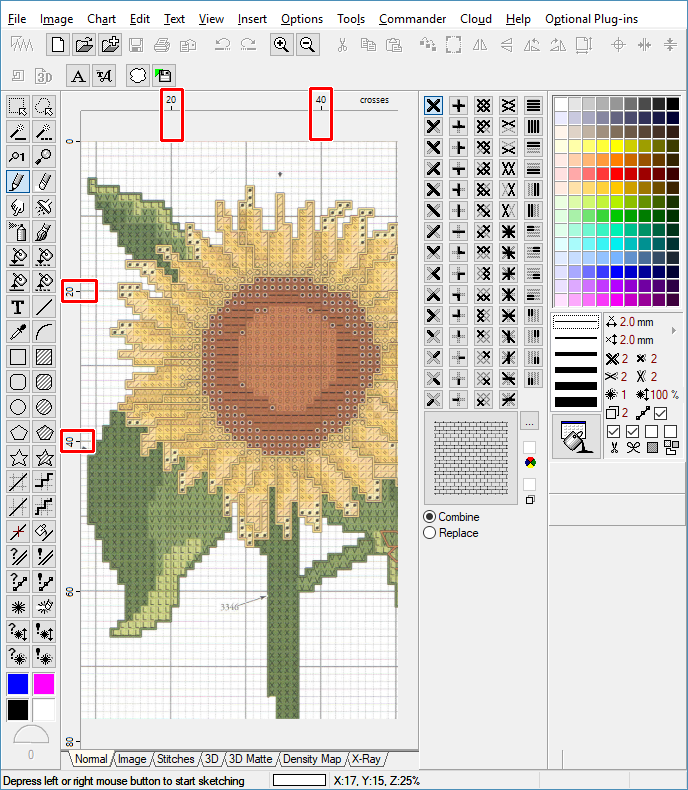
10 - The aligned chart is now displayed as the background of work area (Picture No. 8). Now you can manually put crosses on their position. Before you start, it is a good idea to set the "View > Crosses As Squares" option to ON to make the crosses you draw more visible on the blurred background.
8. Aligned chart on Work Area