
Navigate
Products
Download
eShop
Upgrade
About
Training
Support

Navigate
Products
Download
eShop
Upgrade
About
Training
Support
This tutorial explains how to create a new fill pattern in Embird Cross Stitch plug-in. You can create either monochrome patterns (typically) or even color fill patterns. Each pattern is standard Embird Cross Stitch File (.ECF), but what makes it different from other .ECF files is it location on the hard disk: Only files stored in "{User data folder}\X_FILLS" folder are recognized as fill patterns for Embird Cross Stitch plug-in.
Note: Find out the {User data folder} on your PC by selecting "Help > Installed Plug-ins" menu in Embird.
Note: If you create some pattern which you would like to share with other users, please send us the .ECF file containing the pattern and we will be able to include it into the set of pre-defined patterns in the next version of Embird.
1 - Run Embird and click "Editor" menu to switch to Editor window.
2 - Select "Insert > Cross Stitch Design" menu to open Embird Cross Stitch window.
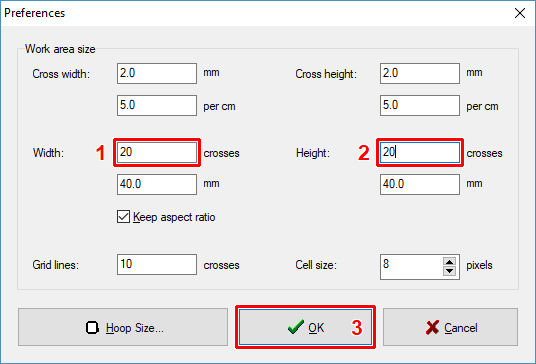
3 - The Cross Stitch plug-in will be launched, and its "Preferences" box will appear on the screen (Picture No.1). Specify the width and height of Work Area, e.g. 18 x 18 crosses. The cross size settings are not important if you create a fill pattern.
1. Specify width and height of Work Area
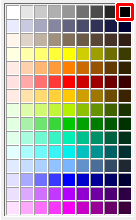
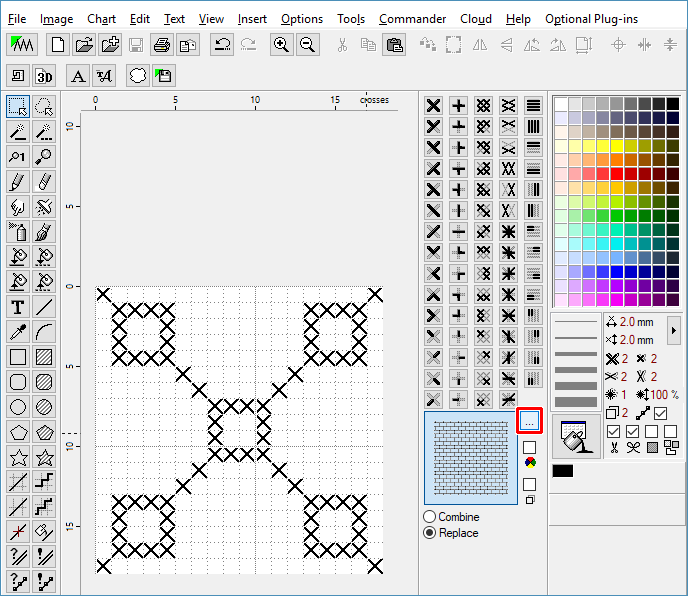
4 - Select black color by left-clicking on it in the Color Palette Bar at the right side of the screen (Picture No. 2).
2. Select black color
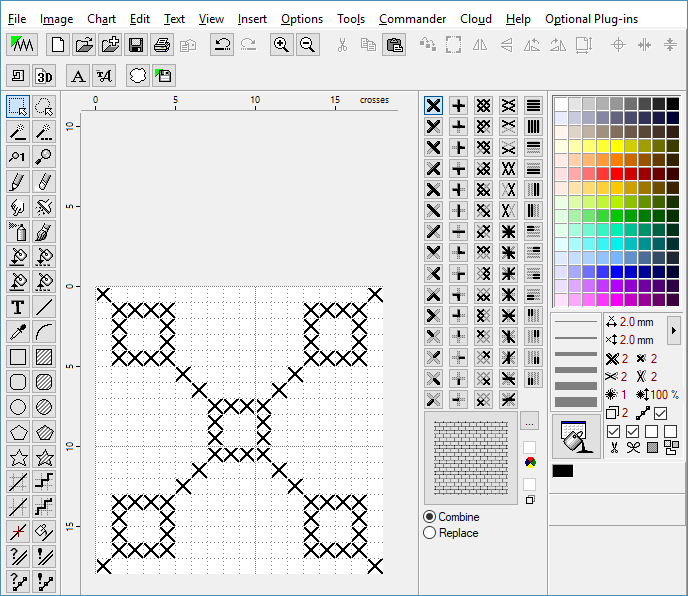
5 - Use Cross Stitch tools to draw your pattern (Picture No. 3). Make sure that the pattern you create is continuous, i.e. if you imagine tiles of your patterns placed one beside the other they should create homogeneous pattern. If necessary change the work area size in "Options > Preferences" menu.
Note: More information about tools is available in Embird Cross Stitch - Design Toolbar tutorial. More information about creating a new cross stitch design is available in Embird Cross Stitch - Creating Simple Design tutorial.
3. Draw new fill pattern
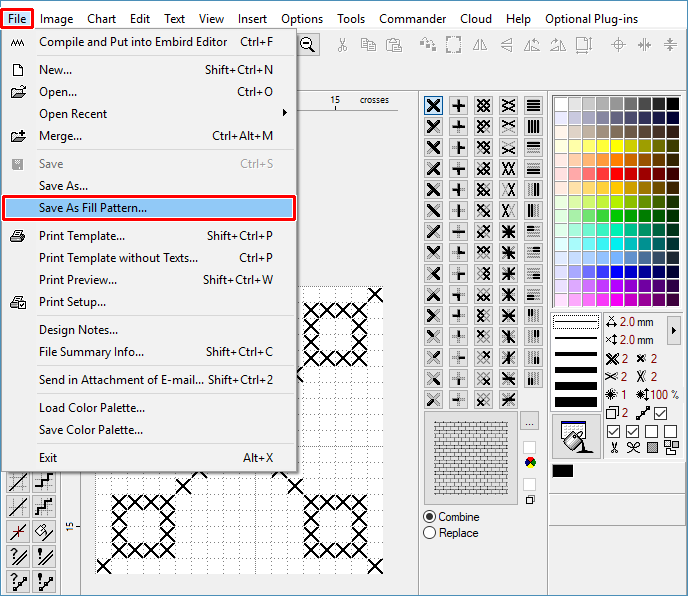
6 - When the pattern is finished, save it to hard disk using the "File > Save As Fill Pattern" command (Picture No. 4).
4. Save as fill pattern
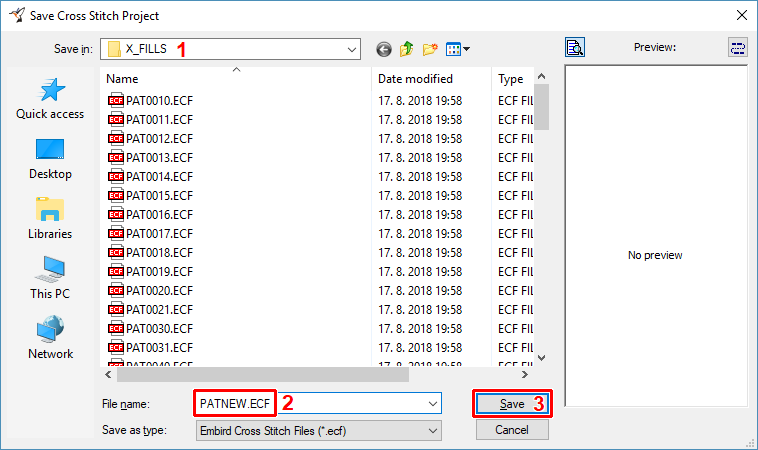
7 - Choose file name for new fill pattern (Picture No.5).
5. Choose file name
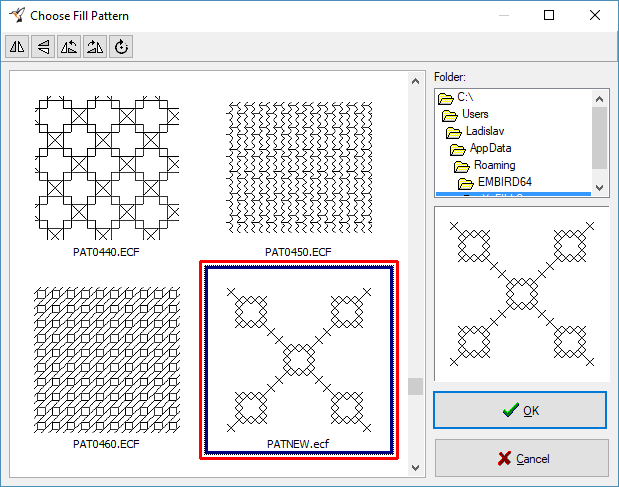
8 - The pattern is now ready for use. Click the "Choose fill pattern" button to check the pattern (Picture No. 6).
6. Click the "Choose fill pattern" button
9 - Search for the new pattern in the dialog box which appears on the screen (Picture No. 7). Choose the new pattern by clicking on it, this will draw a blue selection rectangle around it. Click "OK" button to confirm your selection.
7. Choose your new fill pattern
10 - Now you can fill in the areas using your new pattern.