Navigate
Products
Download
eShop
Upgrade
About
Training
Support

Navigate
Products
Download
eShop
Upgrade
About
Training
Support
This tutorial explains how to split a design into two parts using function "split before color" or "split after color" and how to split a design into three parts using function "separate color".
Note: Other ways of splitting are explained in the following tutorials:
Interactive Free-Hand Splitting, Using Initial and Ending Stitch Boxes, Auto-Split, Auto-Split Along Hoop Boundaries and Saving and Sewing of Split Designs.
1 - Run Embird and click "Editor" menu to switch to Editor window.
2 - Select "File > Open" menu to open the design which you want to split.
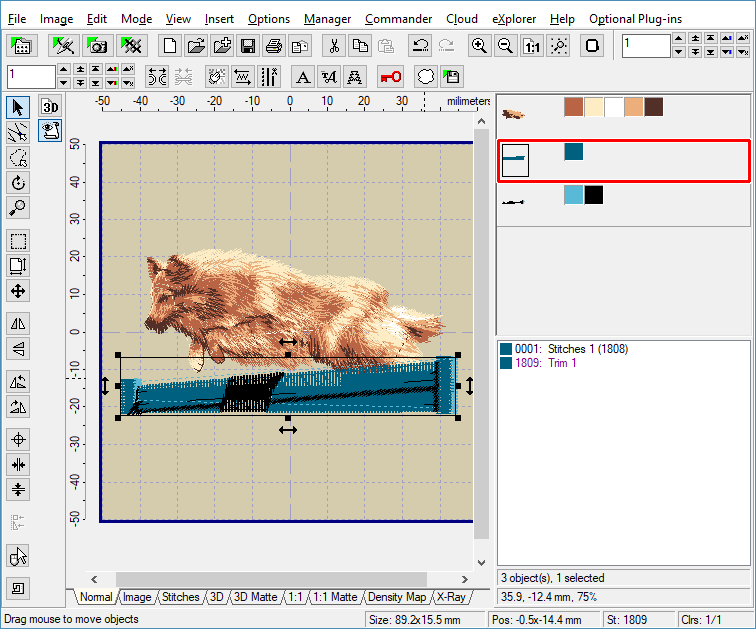
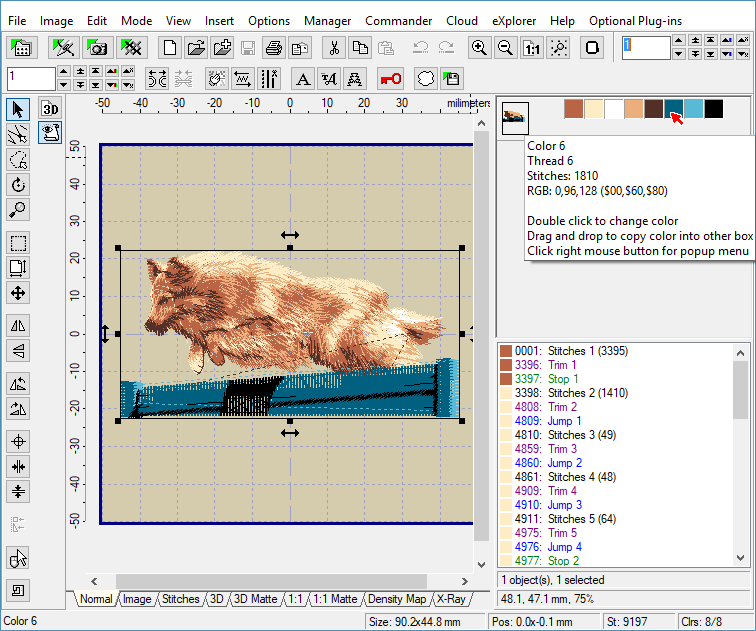
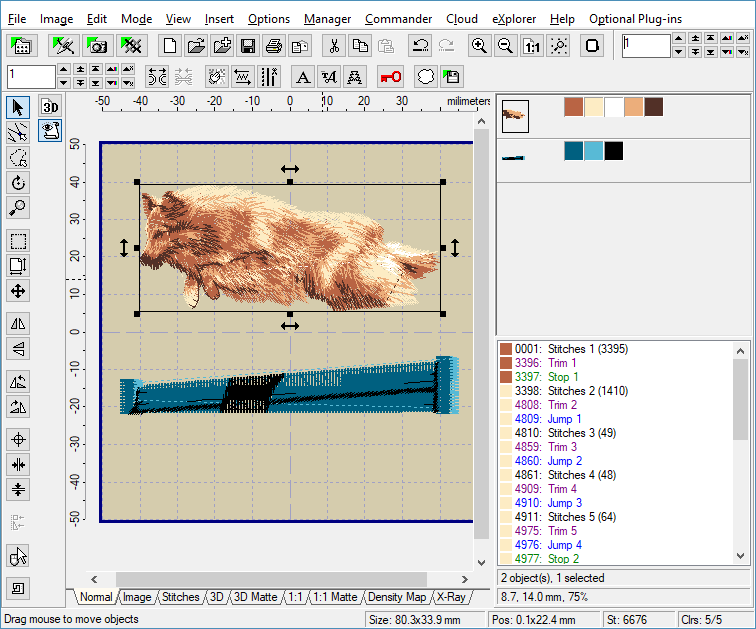
3 - Choose the color before which you want to split the design. Move mouse pointer to the box containing this color in the "Objects Order Bar" at the right side of the screen (Picture No. 1). After a short while, the yellow box with hint will appear on the screen.
1. Choose color
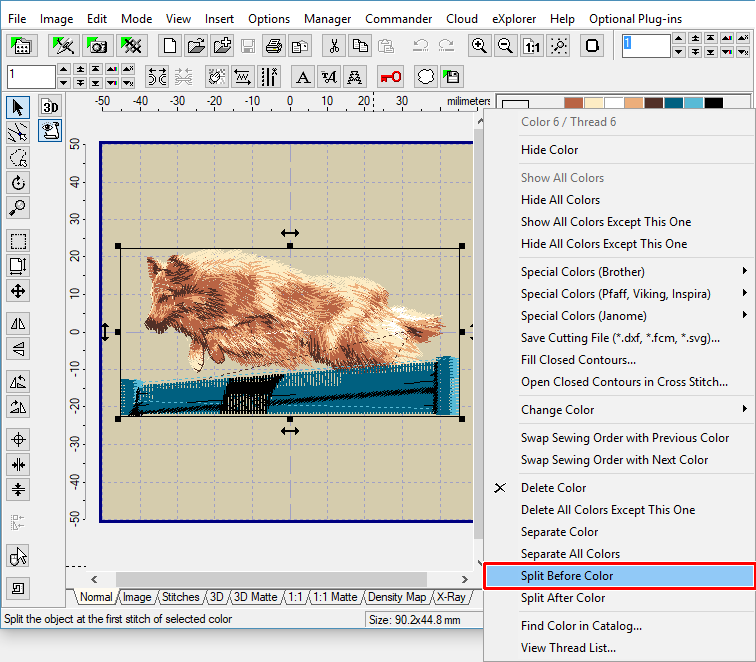
4 - Click right mouse button for popup menu and select "Split Before Color" command from this menu (Picture No. 2). Embird will split the design before chosen color (i.e. before color 6 in this example) and after a while you will see that there are 2 objects at the right side of the screen ("the dog" and "the blue barrier").
2. Right click chosen color box
5 - To save separated object into file on your hard disk, or to move it in Work Area, click left mouse button on this object in Work Area (Picture No. 3). The black rectangle will be drawn around the object, which indicates that this object is now selected.
3. Select separated object

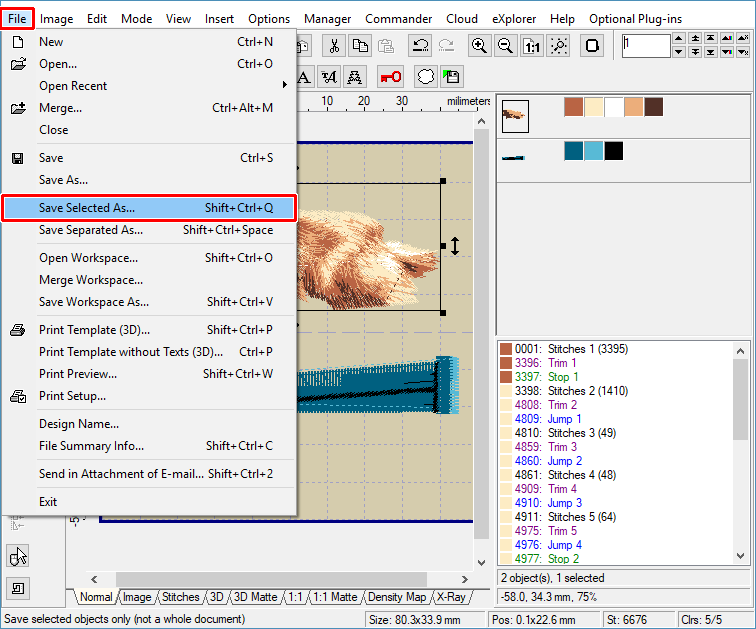
6 - Click "File > Save Selected As" menu to save the selected object to a file on your hard disk (Picture No. 4).
4. Save selected part
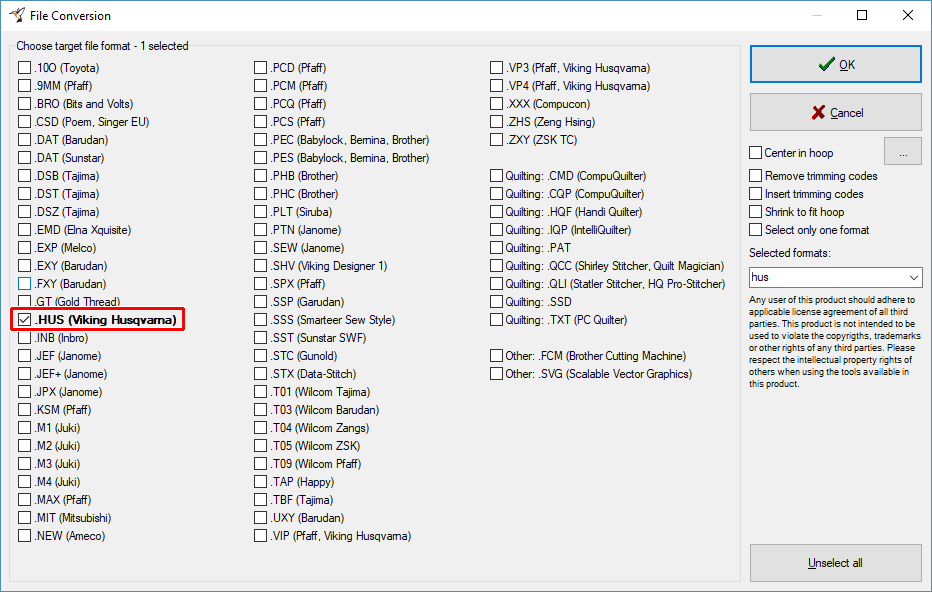
7 - Specify the format in the dialog box which appears on the screen (Picture No. 5). Check the manual of your embroidery machine to find out which format is accepted by your machine. Click "OK" button to continue.
5. Choose target file format
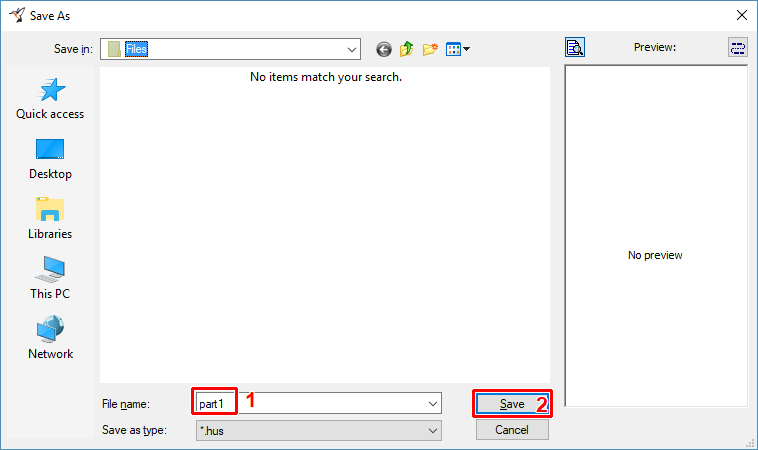
8 - Choose folder and the name of file into which the stitches of selected object will be saved. Click "Save" button to continue (Picture No. 6).
6. Choose drive, folder and file name of design
9 - Repeat steps 5 to 8 if you want to save also the second part of the design to a file on your hard disk.
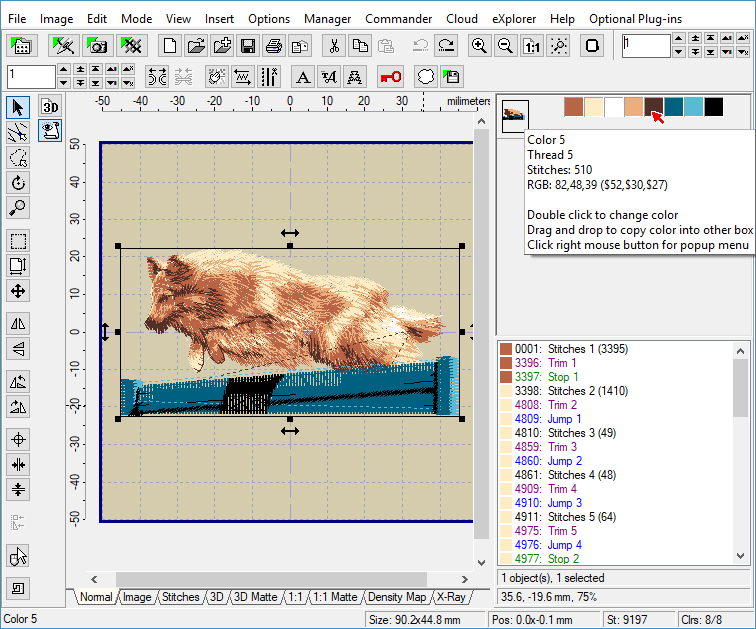
10 - Command "Split After Color" will split the design after the chosen color. Choose the color, after which you want to split the design. Move mouse pointer to the box containing this color in the "Objects Order Bar" at the right side of the screen (Picture No. 7). After a short while, the yellow box with hint will appear on the screen.
7. Choose color
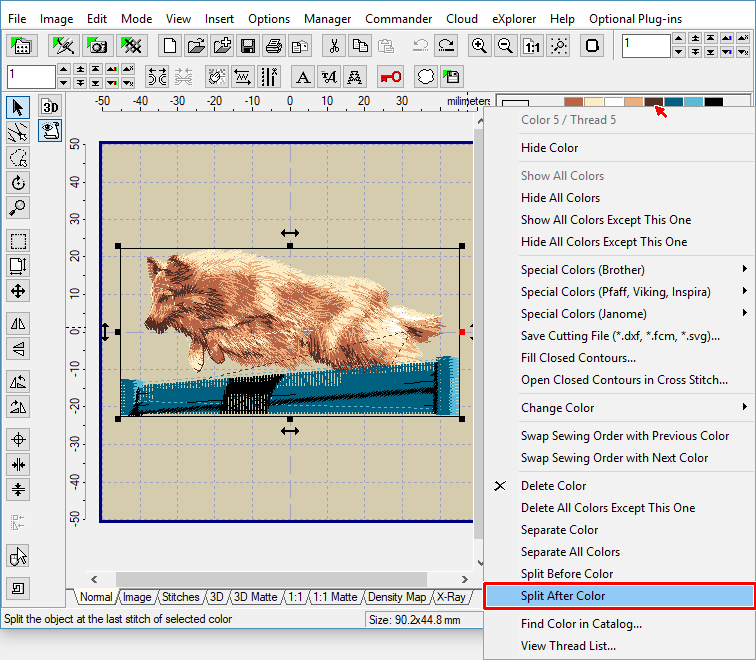
11 - Click right mouse button for popup menu and select "Split After Color" command from this menu (Picture No. 8).
8. Right click chosen color box
12 - Embird will split the design after chosen color (i.e. after color 5 in this example) and after a while you will see that there are 2 objects at the right side of the screen ("the dog" and "the blue barrier"). Each part is now independent object, and it can be selected, moved or saved separately (Picture No. 9), as explained in steps 5 ~ 8.
9. Separated objects
13 - The "Separate Color" command will split the design into three parts. Choose the color which you want to separate. Move mouse pointer to the box containing this color in the "Objects Order Bar" at the right side of the screen (Picture No. 10). After a short while, the yellow box with hint will appear on the screen.
10. Select color to separate

14 - Click right mouse button for popup menu and select "Separate Color" command from this menu (Picture No. 11).
11. Right click chosen color box
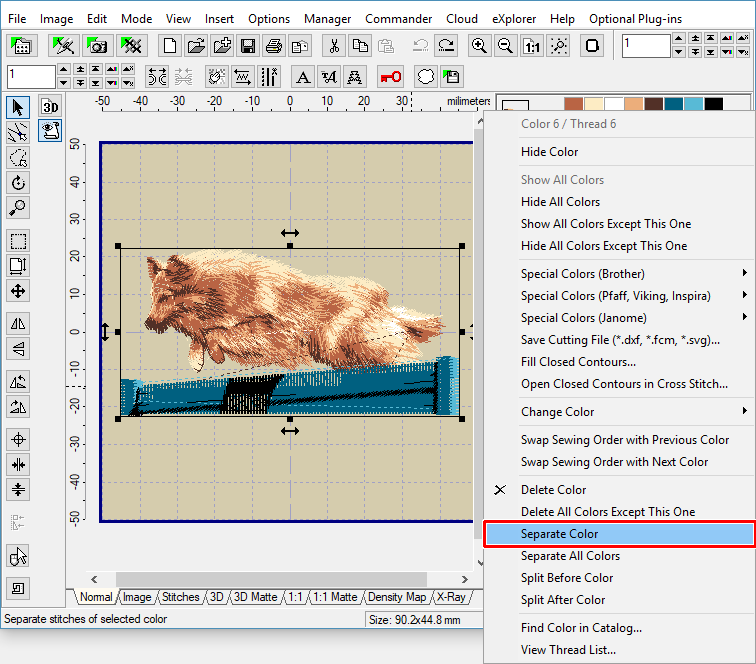
15 - Embird will split the design into 3 parts (Picture No. 12): The first part contains all colors which are stored in original design before the chosen color (i.e. color 1 ~ 5 in this example), the second part is the chosen color (color 6), and the third part contains all colors which are stored in original design after the chosen color (colors 7 and 8). Each part is now independent object, and it can be selected, moved or saved separately, as explained in steps 5 ~ 8.
12. Separated objects