
Navigate
Products
Download
eShop
Upgrade
About
Training
Support

Navigate
Products
Download
eShop
Upgrade
About
Training
Support
This tutorial explains how to split a design using the free-hand selection of object area.
Note: Other ways of splitting are explained in the following tutorials: Split Before/After Color, Separate Color, Using Initial and Ending Stitch Boxes, Auto-Split, Auto-Split Along Hoop Boundaries and Saving and Sewing of Split Designs.
1 - Run Embird.
2 - Click "Editor" menu to switch to Editor window.
3 - Select "File > Open" menu to open the file, which will be split into two parts.
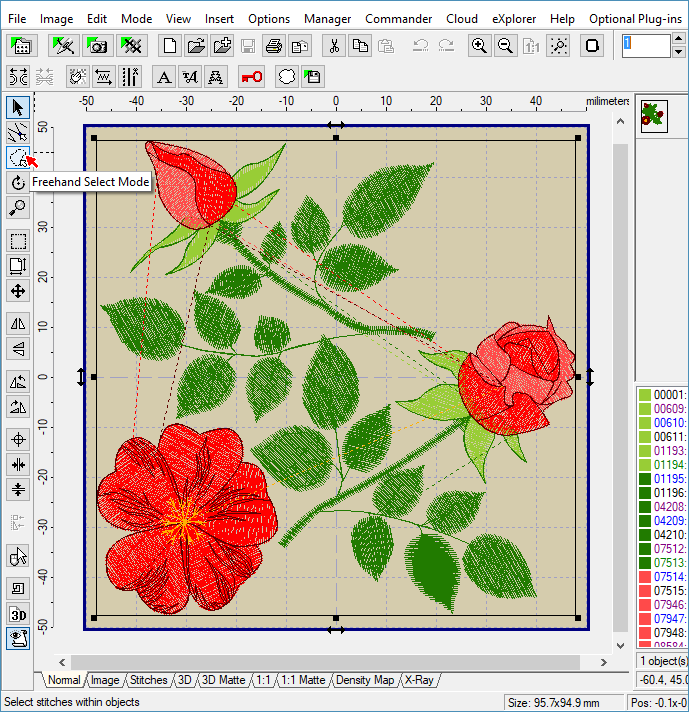
4 - Click "Freehand Select Mode" icon to choose the freehand select mode (Picture No. 1).
1. Choose Freehand Select Mode
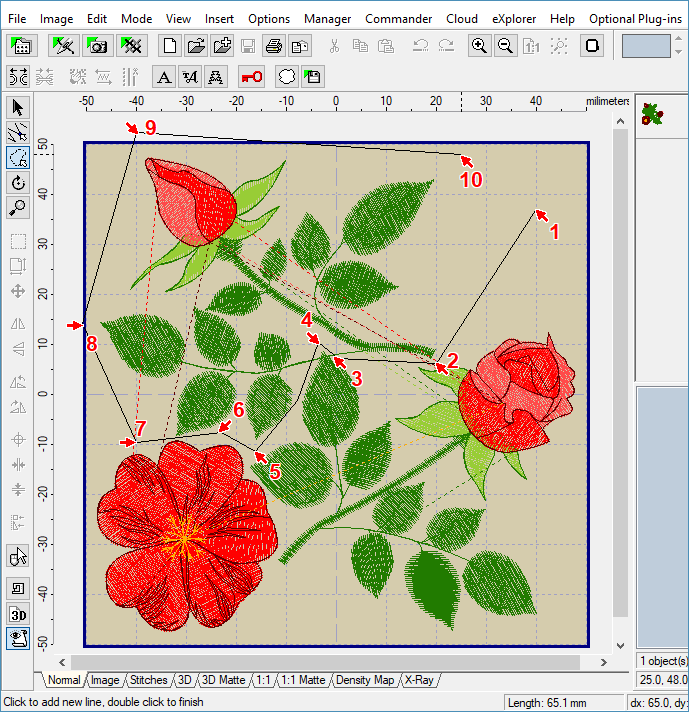
5 - Select the area which you want to separate (cut out). Move mouse pointer to Work Area and click left mouse button to place the starting point of the selection (1 in Picture No. 2). Move mouse pointer to another position on Work Area and click left mouse button to place the second point of the selection, and repeat this procedure until you create a boundary around the whole part, which you want to separate. If you make a mistake, click right mouse button do delete the current last point of boundary. Finally, double click the left mouse button to close the boundary. The stitches lying inside the boundary are selected and drawn as red (Picture No. 3).
2. Select area to separate
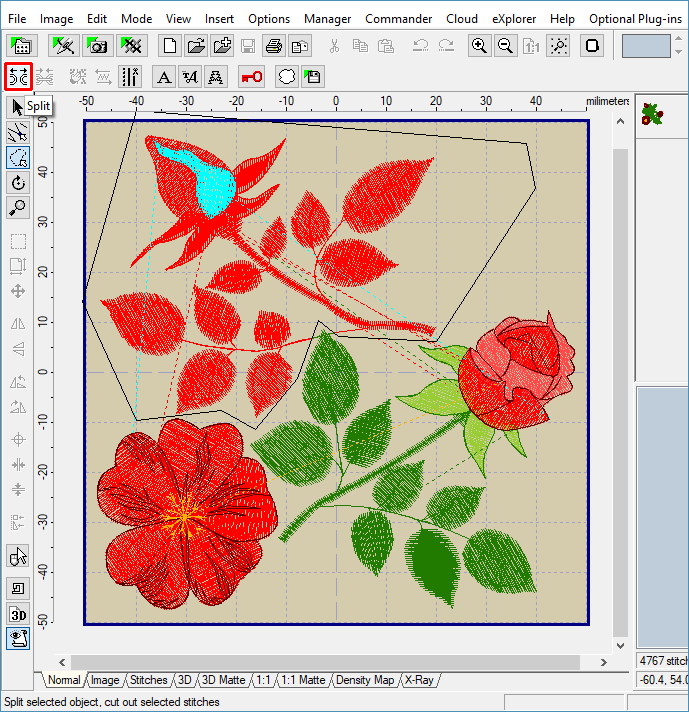
6 - Click "Split" button located in the toolbar at the top of the screen to separate the red selection (Picture No. 3).
3. Click "Split" button to separate the selection
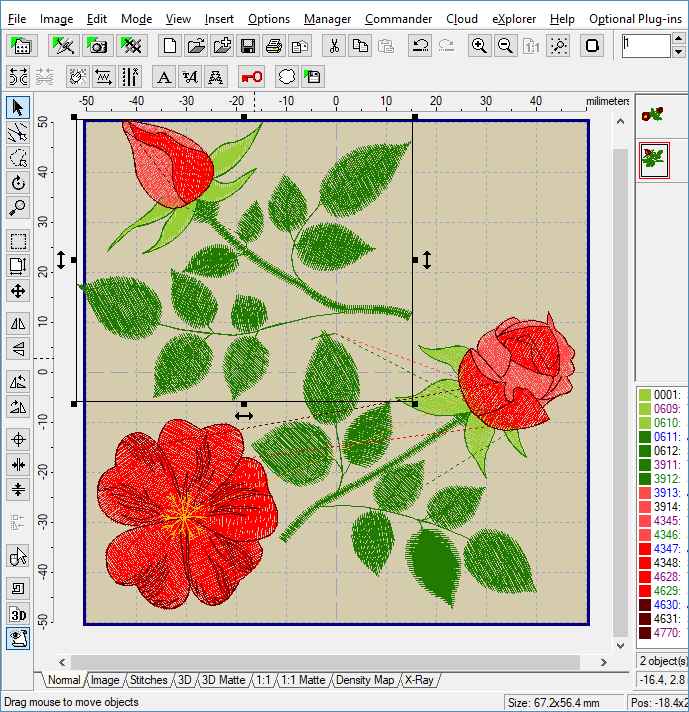
7 - Now you can see that the design was split into 2 parts. Some designs might be split also to 3 parts, depending on what part you decide to separate. To save the separated part into a file on your hard disk, or to move it over the Work Area, click the left mouse button on the part to select it. A black frame is drawn around the design when it is selected. (Picture No. 4).
4. Click left mouse button on the part to select it
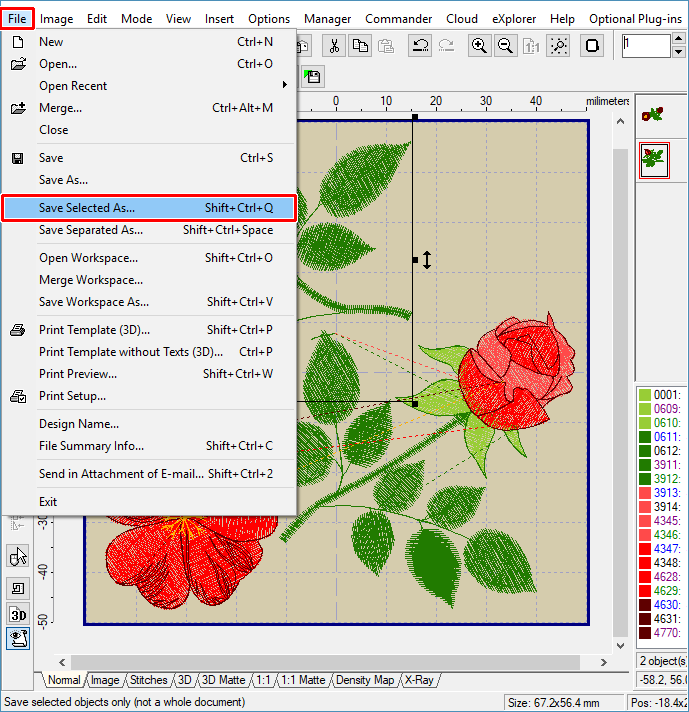
8 - Click "File > Save Selected As" menu to save the selected part (Picture No. 5)
5. Save selected part
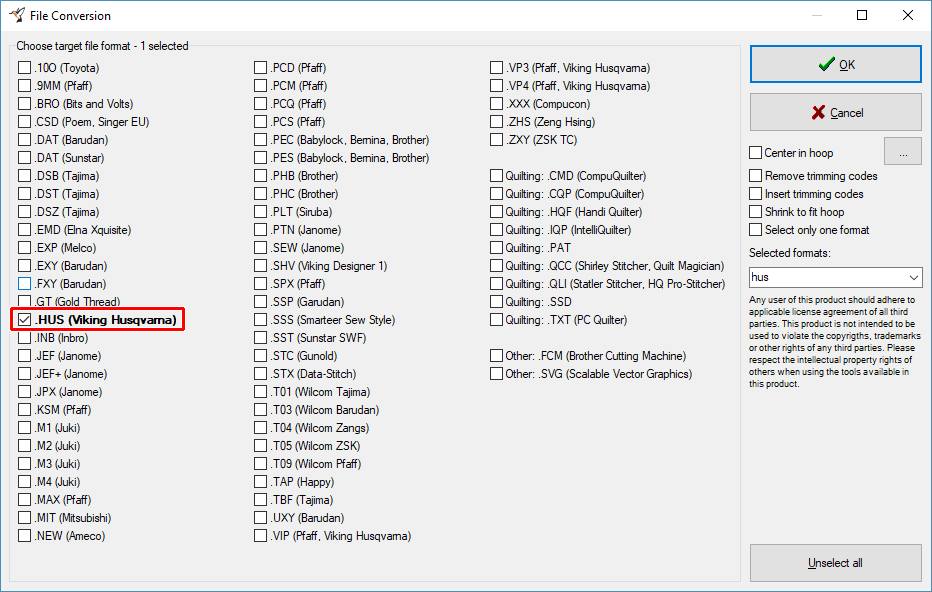
9 - Choose the target file format in the dialog box which appears on the screen (Picture No. 6). Click "OK" button to continue.
6. Choose target file format
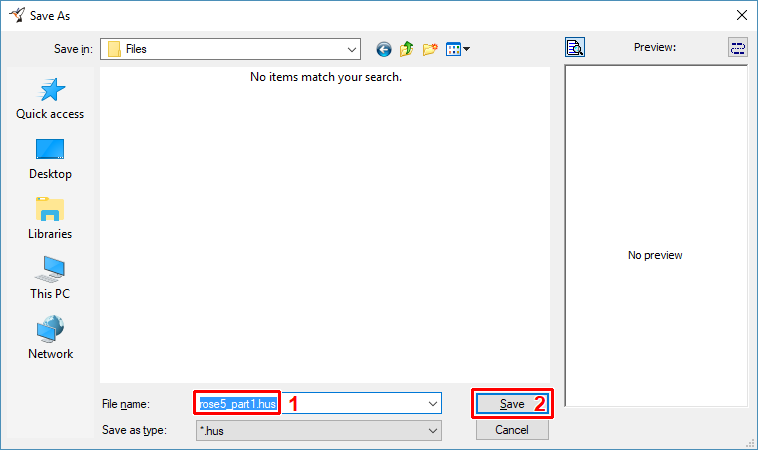
10 - Choose the drive, folder and file name of the design being saved (Picture No. 7). Click "Save" button to continue.
7. Choose drive, folder and file name of design
11 - To save the second part of the design, select it first and then repeat the steps 7 to 10.
12 - When you have successfully saved all parts, you can open some of these parts to check it.
13 - Embird will ask you whether you want to save the changes in the original design (in the design you have opened in step 3 and split). If you don't want to overwrite the original embroidery, click "No" button in "Confirm" dialog box which appears on the screen (Picture No. 8).
8. Don't overwrite original embroidery

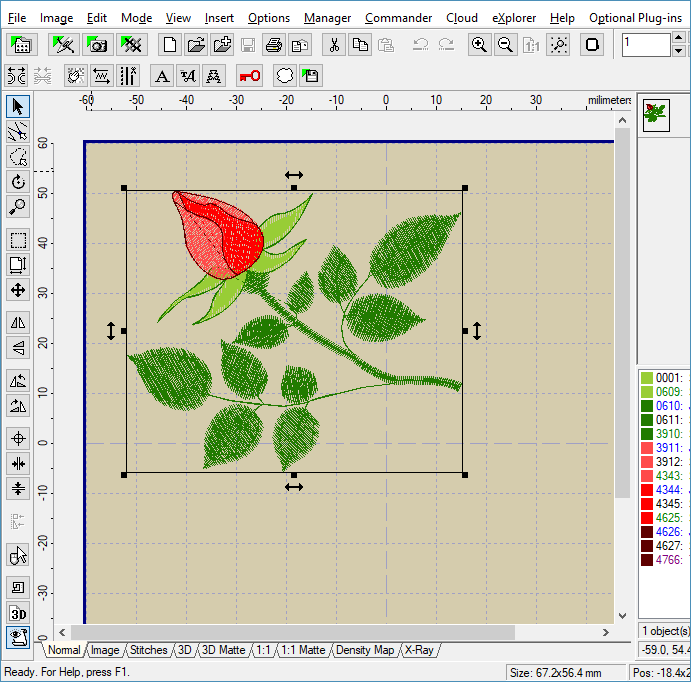
14 - The part which was selected in step 12 is open and appears on Work Area. (Picture No. 9).
9. Open selected part
15 - When finished, use "File > Exit" menu to exit Editor.