
Navigate
Products
Download
eShop
Upgrade
About
Training
Support

Navigate
Products
Download
eShop
Upgrade
About
Training
Support
Aligning stitches can be added horizontally, vertically, diagonally or all three. Typical usage of aligning stitches is for designs which are larger than your hoop size, and therefore must be split into usable parts. Aligning stitches simplify the positioning of the various parts in the hoop when embroidering, allowing you to match up the split parts.
Note: In Embird, there exists an another easier way of inserting aligning stitches. However, you should read this tutorial first to understand what is going on. Then read Inserting Aligning Stitches (Another Way) tutorial.
1 - Run Embird and click on the "Editor" menu.
2 - Open the file you want to edit. Select the "File -> Open" menu to open a file.
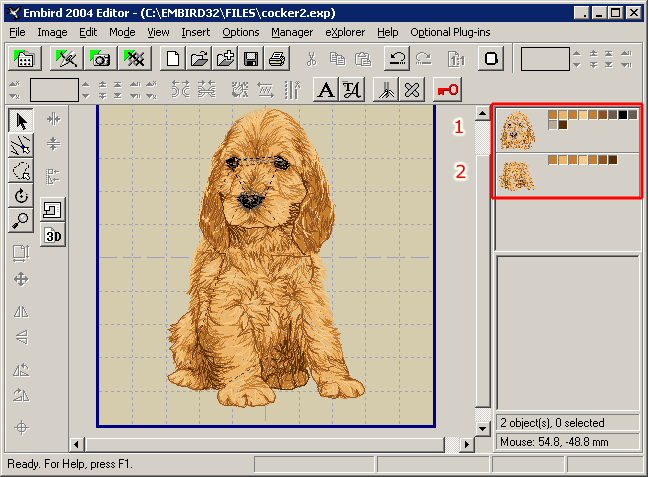
3 - Split the design into the appropriate number of parts. In our example the design was split into 2 parts: top and bottom. These parts can be seen in the "Objects Order Bar" at the right side of the screen (Picture No. 1). Read the Interactive Freehand Splitting tutorial to find out how to split a design.
Picture No. 1
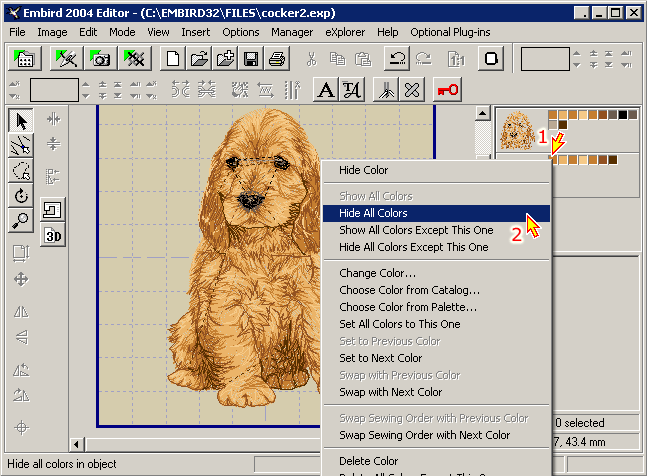
4 - First we want to add the aligning stitches to the top part. Therefore we will hide the bottom part for a moment. Move the mouse cursor to any of the color boxes belonging to the bottom part and then click the right mouse button. Choose the "Hide All Colors" command in the popup menu which appears on the screen (Picture No. 2).
Picture No. 2
5 - Select "Mode -> Points Editing Mode" menu to switch to this mode.
6 - Click the left mouse button and a small dotted box will appear
![]() .
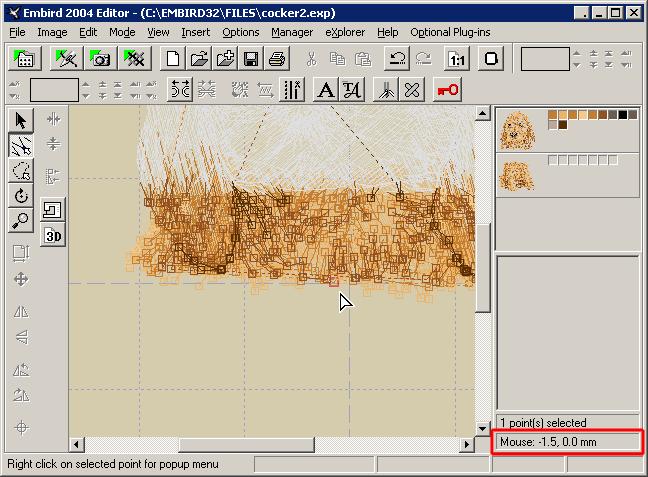
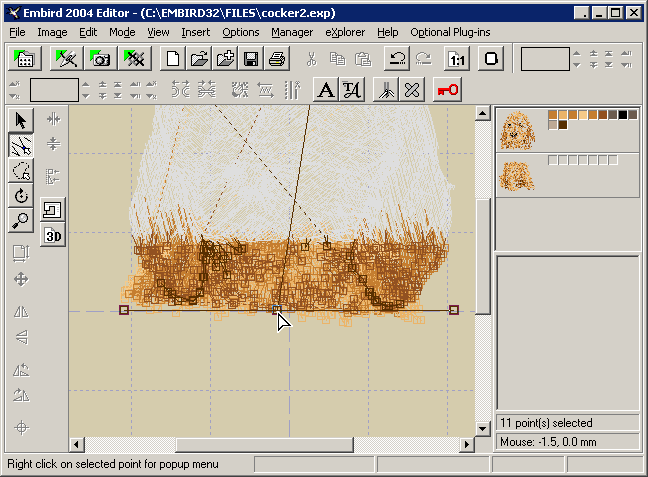
Drag this box around the area you want to edit, making sure it contains at least one
point belonging to the top part (Picture No. 3).
.
Drag this box around the area you want to edit, making sure it contains at least one
point belonging to the top part (Picture No. 3).
7 - Choose the join point, i.e. the point where you want the two files to join. In our example we have chosen the point -1.5, 0.0 mm. These co-ordinates can be seen on the bottom of the "Objects Order Bar". Make a note of these co-ordinates for use in step 15 below. Move the mouse pointer to this position.
Picture No. 3
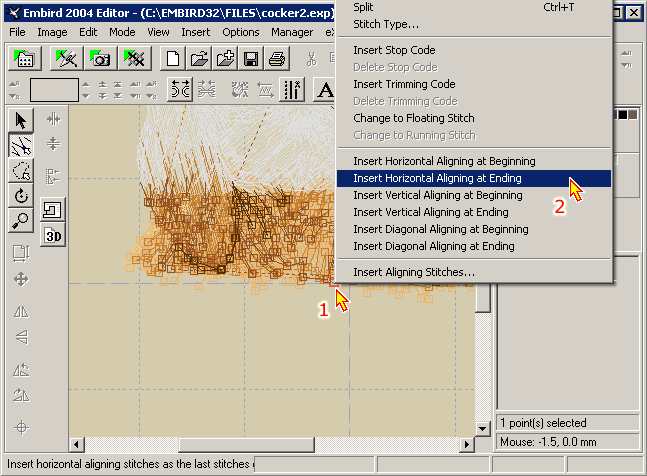
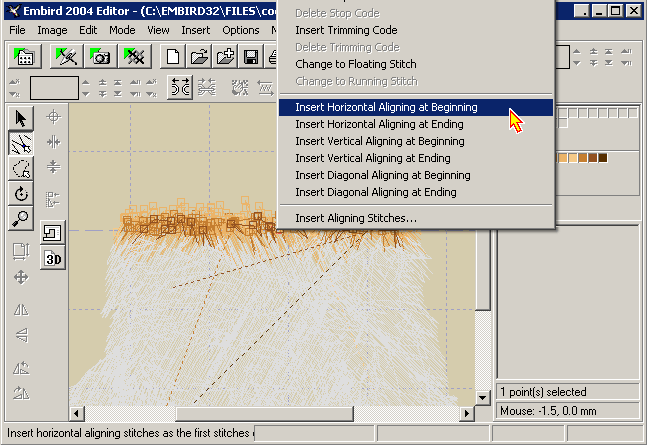
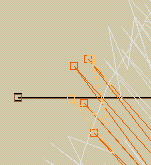
8 - Click the right mouse button for the popup menu. Choose the "Insert Horizontal Aligning at Ending" command (Picture No. 4). This command will add the aligning stitches to the end of the top part.
Picture No. 4
9 - Three new aligning points were automatically added to the end of the top part (Picture No. 5). The first point is at the co-ordinates of the join point. The second point is the left one and the third point is the right one. The left and right points have the same Y co-ordinate as the join point. Their X co-ordinates are determined by the width of the top part.
Picture No. 5
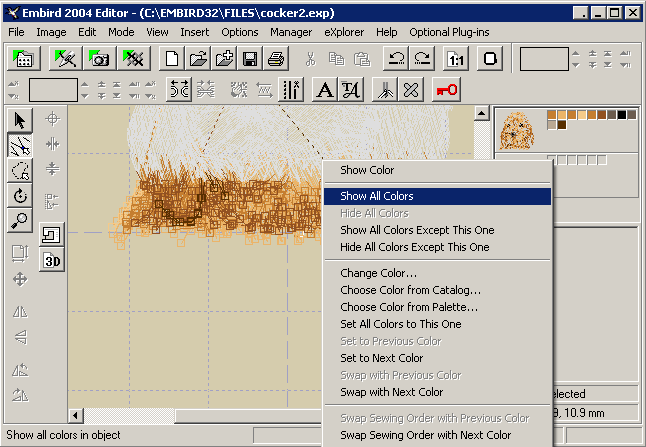
10 - We are going to repeat the same process with the bottom part. Move the mouse cursor to any of the color boxes belonging to the bottom part and click the right mouse button for the popup menu. Choose the "Show All Colors" command (Picture No. 6).
Picture No. 6
11 - Hide all colors belonging to the top part, using the same steps as shown in step 4 above.
12 - Select "Mode -> Select Mode" menu to switch to this mode. This will cancel the current area of editing in the top part.
13 - Select "Mode -> Points Editing Mode" menu to switch to this mode.
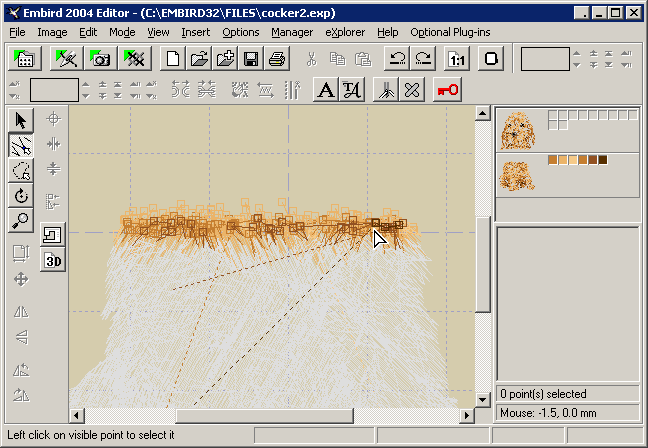
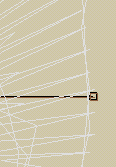
14 - Following the step 6 above, specify any area of editing, but make sure it contains at least one point belonging to the bottom part (Picture No. 7).
15 - Move the mouse pointer to the join point - in our example point -1.5, 0.0 mm.
Picture No. 7
16 - Click the right mouse button for the popup menu. Choose the "Insert Horizontal Aligning at Beginning" command (Picture No. 8). This command will add the aligning stitches at the beginning of the bottom part.
Picture No. 8
17 - As the distance between the left and right aligning points will be equal to the width of the section being worked on, the distance between these points may be different for each section (not all parts of a design are the same width). You must therefore move the right and left aligning points so that they match the corresponding points in the top part. (Picture No. 9).
To do this, move the mouse cursor to any of the color boxes belonging to the bottom part and click the right mouse button and choose "Show All Colors" from the popup command which appears on the screen. Then click "Mode -> Points Editing Mode" menu to switch to this mode. Click the left mouse button and highlight the left aligning points of the design. Left click and drag the bottom aligning points (stitches) so that they match the corresponding points in the top part. Do the same for the right aligning points. Both designs should now be the same width with the aligning stitches sitting on top of one another. (If you cannot see whether the left and right aligning points match, choose "Select Mode" from the "Mode" menu, select the top section of the design and move it up a little bit so the aligning stitches show. You should now be able to see both sets of aligning points and make the necessary adjustments.
Hint: You can use the reference points in the co-ordinate box to help with the lining up.)
Picture No. 9
Tips:
1 - In a design split into three or more parts, the aligning stitches are inserted at the end of the top section, at both the beginning and end of any "middle" sections and at the beginning of the bottom section.
2 - Do not forget to add tie-off/on stitches just before the "Ending" aligning stitches and after the "Beginning" aligning stitches.
3 - If your aligning stitches do not show up because they are the same color as the screen background or the same color as the aligning stitches of the next part, temporarily change their color. These stitches will be either the first or the last color to the right in the "Objects Order Bar" in the part you are working on. Change the color back to the original color when you have completed the editing.
4 - When you are sewing the design out, start sewing out the first section and leave the aligning stitches in. Re-hoop the fabric or move the hoop and use the adjustments on your machine so that the first aligning stitches of the next part sit exactly on top of the previous section then sew out. Complete the design and finally remove all aligning stitches.