Navigate
Products
Download
eShop
Upgrade
About
Training
Support

Navigate
Products
Download
eShop
Upgrade
About
Training
Support
The following tutorial explains how to write USB memory sticks for Viking Designer 1 embroidery machine in Embird. Before you start using USB memory sticks written in Embird with Designer 1 machine, make sure that the machine has the latest firmware version 2.24. Older firmware does not accept designs stored on memory sticks which were created in Embird.
1 - Run Embird, it will start in "Manager" mode.
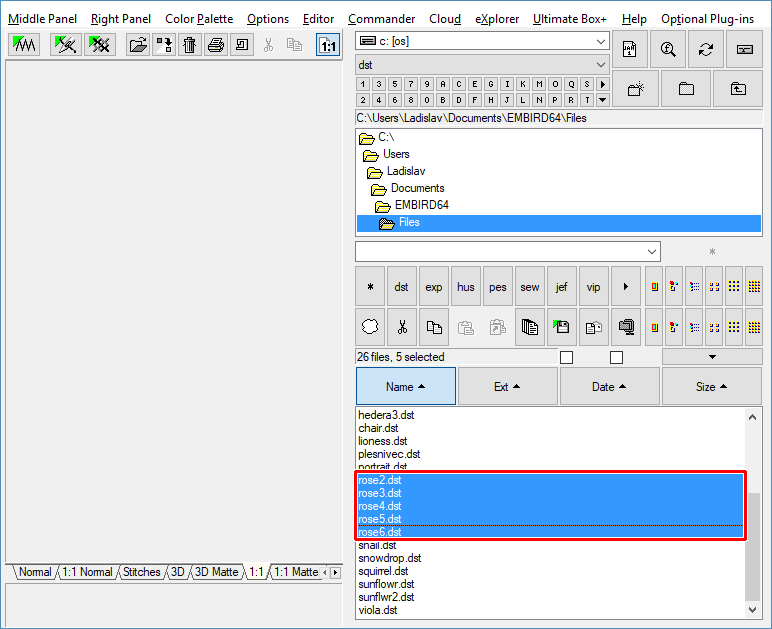
2 - In the "Files:" box at the right side of the screen select the design which you want to write to USB memory stick. To select a design, please move the mouse pointer to its file name and click the left mouse button (Picture No.1).
Note: You can select multiple files and write them to USB memory stick at once.To select multiple designs, please move mouse pointer to the file name of the first design in the "Files:" box at the right side of the screen, depress the left mouse button and hold it down while moving the mouse pointer over the file names of the other designs. When the mouse pointer is over the last design, please release the left mouse button.
1. Select files to be written to Viking Designer 1 card
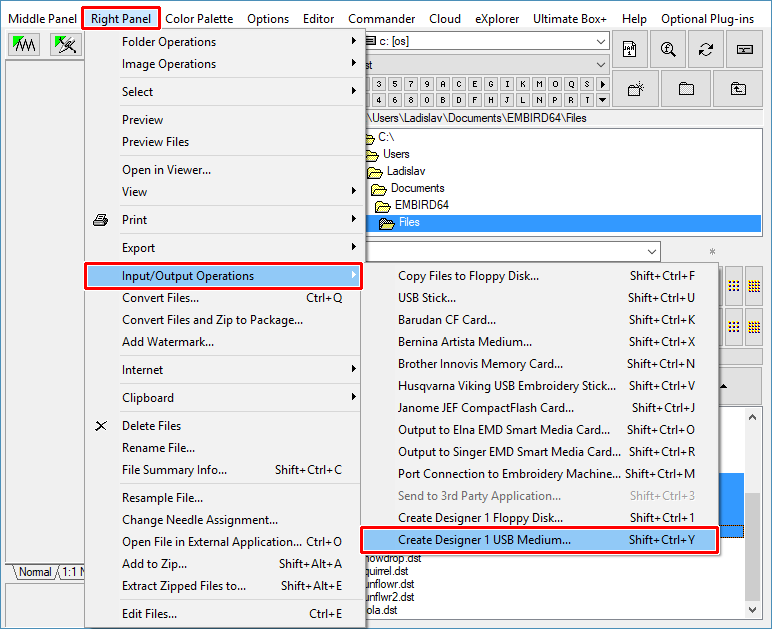
3 - Click "Right Panel > Input/Output Operations > Create Designer 1 USB Medium" menu to create Designer 1 USB memory stick contents of selected designs (Picture No. 2).
2. Select "Right Panel > Input/Output Operations > Create Designer 1 USB Medium" menu
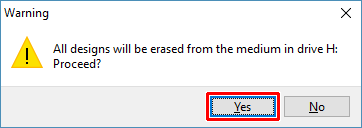
4 - After a short while (depending on the current contents of USB memory stick), a new dialog box will appear on the screen (Picture No. 3). Choose the drive containing the USB memory stick using "Drive:" box. In this example, it is "H:" drive, which contains the empty USB memory stick. In case your USB memory is not empty, continue with step 5, otherwise click "Format medium" button to create empty VFD.BIN and VFD00.BIN ~ VFD11.BIN files, which are used for storing .SHV designs. Embird will warn you that the formatting will delete the current contents of VFD files, click "Yes" button to continue (Picture No. 4).
3. Select drive containing USB memory stick
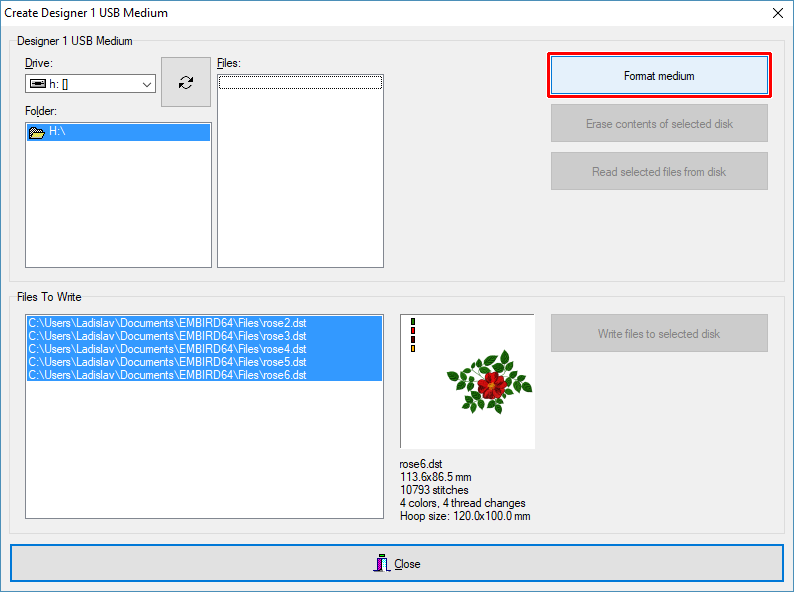
4. Format USB memory stick
5 - Embird will read the contents of all VFD files from USB memory stick and it will temporarily unpack their contents into the "Temp_D1_USB" folder on your hard disk (Picture No. 5). Choose some of the disks "Disk01" ~ "Disk12" in the "Folder" box, this disk will be used for storing new designs. You can choose the disk by double-clicking its name under "Temp_D1_USB" folder.
5. Select target virtual Disk on USB memory stick
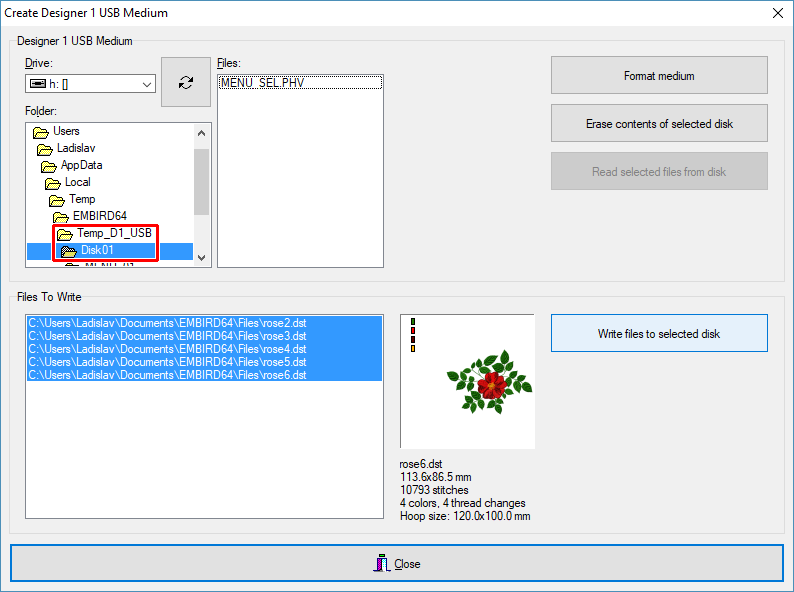
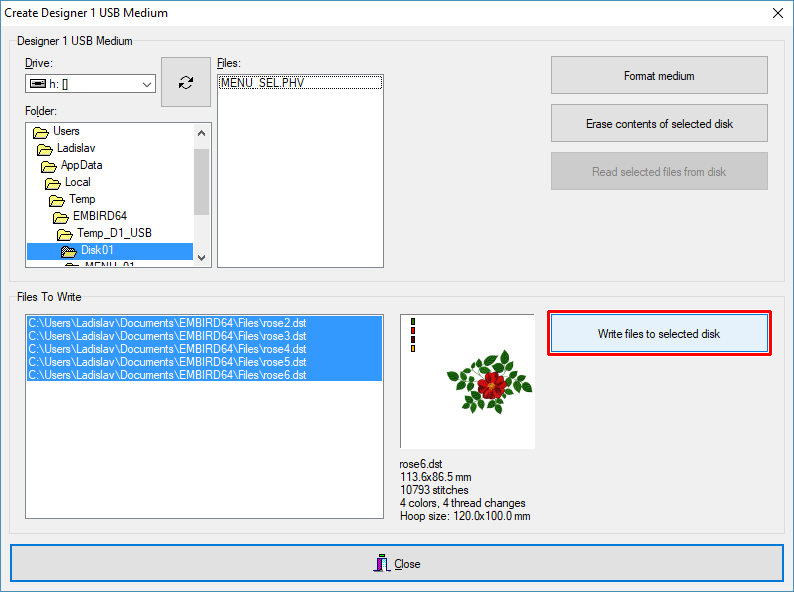
6 - In this example, we have selected "Disk01" for storing designs (Picture No. 6). Click "Write files to selected disk" button to start writing .SHV designs on Disk01.
Tip 1: Click "Erase contents of selected disk" button if you want to delete all designs stored on Disk01.
Tip 2: If you want to read existing .SHV files from the Disk01, select the menu with these designs (double-click either "MENU_01", "MENU_02", "MENU_03" or "MENU_04" folder under Disk01 in the "Folder:" box), then select the .SHV files in "Files:" box and finally click "Read selected files from disk" button. Files will be converted to chosen format and saved into currently chosen folder at right panel in Embird Manager.
6. Write designs to selected Disk
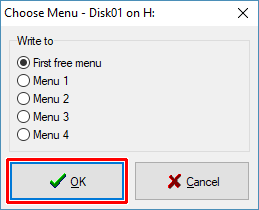
7 - Choose the menu into which the designs will be written (Picture No. 7). You can choose either "Menu 1", "Menu 2", "Menu 3" and "Menu 4", or let Embird write the designs to the first free menu on the chosen disk of USB memory stick.
7. Choose Menu on selected Disk
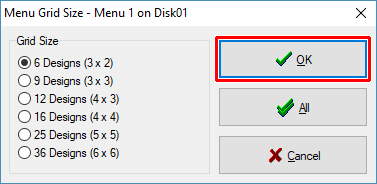
8 - Choose menu grid size on selected Disk (Picture No. 8).
8. Choose menu grid size on selected Disk
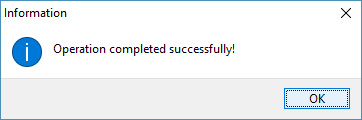
9 - It will take some time to write all selected designs to the USB memory stick. When the operation is finished, Embird will display the results of the writing process (Picture No. 9).
9. Result of write operation