Navigate
Products
Download
eShop
Upgrade
About
Training
Support

Navigate
Products
Download
eShop
Upgrade
About
Training
Support
The following tutorial explains how to write floppy disks for Viking Designer 1 embroidery machine in Embird. Before you start using floppy disks written in Embird with Designer 1 machine, make sure that the machine has the latest firmware version 2.24. Older firmware does not accept designs stored on floppy disks which were created in Embird.
1 - Run Embird, it will start in "Manager" mode.
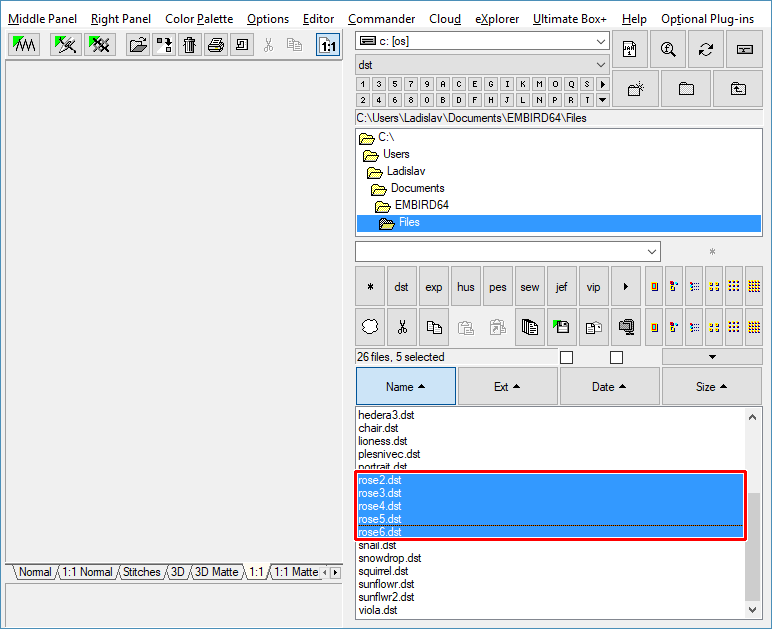
2 - In the "Files:" box at the right side of the screen select the design which you want to write to floppy disk. To select a design, please move the mouse pointer to its file name and click the left mouse button (Picture No. 1).
Note: You can select multiple files and write them to floppy disk at once.To select multiple designs, please move mouse pointer to the file name of the first design in the "Files:" box at the right side of the screen, depress the left mouse button and hold it down while moving the mouse pointer over the file names of the other designs. When the mouse pointer is over the last design, please release the left mouse button.
1. Select files to be written to Viking Designer 1 floppy disk
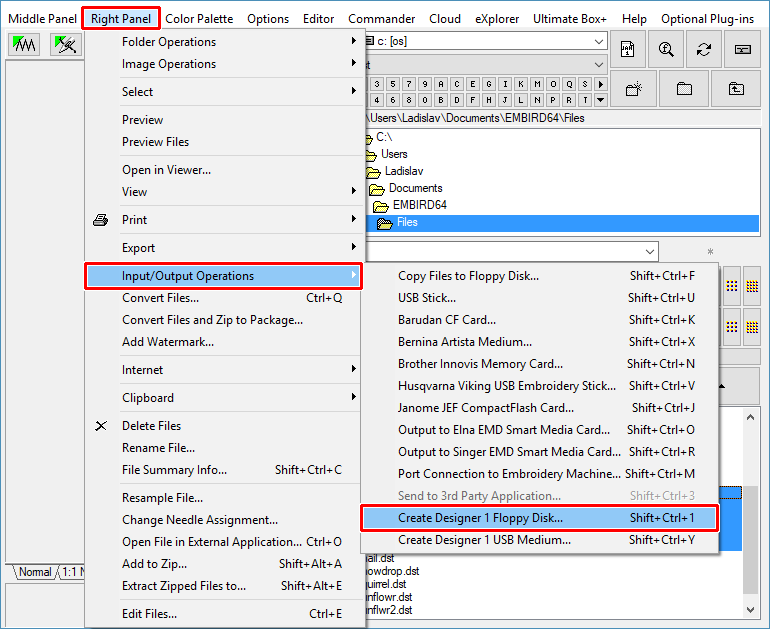
3 - Click "Right Panel > Input/Output Operations > Create Designer 1 Floppy Disk" menu to create Designer 1 floppy disk contents of selected designs (Picture No. 2).
2. Click "Right Panel > Input/Output Operations > Create Designer 1 Floppy Disk" menu
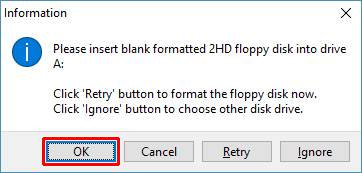
4 - Embird will ask you to insert blank formatted 2HD (standard) floppy disk into disk drive "A:" (Picture No. 3). Click "OK" button to continue with writing designs to the disk.
Tip: Click "Retry" button instead if you want to format the floppy disk before writing designs (Picture No. 3). This will display standard Windows dialog box for formatting disks.
3. Select floppy disk drive
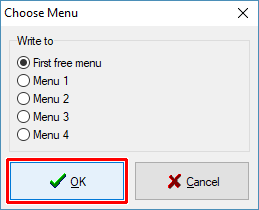
5 - Choose the menu into which the designs will be written (Picture No. 4). You can choose either "Menu 1", "Menu 2", "Menu 3" and "Menu 4", or let Embird write the designs to the first free menu on the floppy disk.
Warning: If you have already written some designs to Designer 1 floppy disk in Embird, you can use this disk again (without formatting or erasing its contents) and Embird will add selected designs to existing designs to chosen menu on this floppy disk. However, do not add designs to floppy disks written in other software - always format or erase these disks before using them in Embird.
4. Choose Menu for writing files
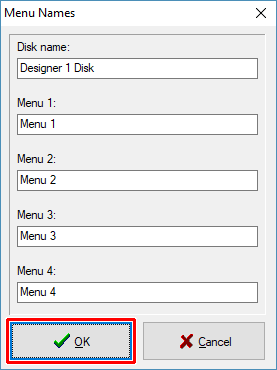
6 - Optionally, it is possible to assign new names to disk and menus (Picture No. 5).
5. Rename disk and menus
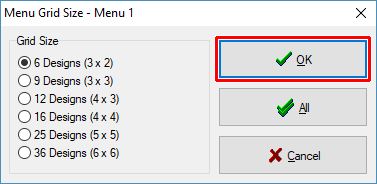
7 - Choose menu grid size for each menu (Picture No. 6).
6. Choose menu grid size
8 - It will take some time to write all selected designs to the floppy disk. The bar below the middle panel shows the progress of the writing process.
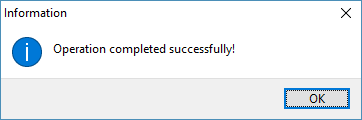
9 - When the operation is finished, Embird will display the results of the writing process (Picture No. 7). Eject the floppy disk, it is ready for use.
7. Result of write operation