Navigate
Products
Download
eShop
Upgrade
About
Training
Support

Navigate
Products
Download
eShop
Upgrade
About
Training
Support
Embird supports standard and non-standard floppy disk formats.
Standard floppy disks are disks with designs stored in standard MS-DOS format. These disks are recognized and can be accessed in Windows Explorer, common file manager or any other application supporting floppy disks. In Embird you can access standard floppy disk by choosing the disk drive (typically "A:") in "Drive:" box in Right Panel of Manager window.
Non-standard floppy disks are disks with designs stored in special format. These disks are not recognized and cannot be accessed in Windows Explorer or in common file manager - these applications report "Disk is not formatted" error when you attempt to read floppy disk contents. In Embird you can access non-standard floppy disks via Left Panel menu of Manager window. However, the non-standard floppy disk formats require low-level access to floppy disk controller and therefore the non-standard floppy disks are supported only on Non-USB floppy drive connected to motherboard floppy port.
Reading Standard Floppy Disks (MS-DOS Format)
1 - Run Embird, it will start in "Manager" mode.
2 - Insert the floppy disk into the disk drive.
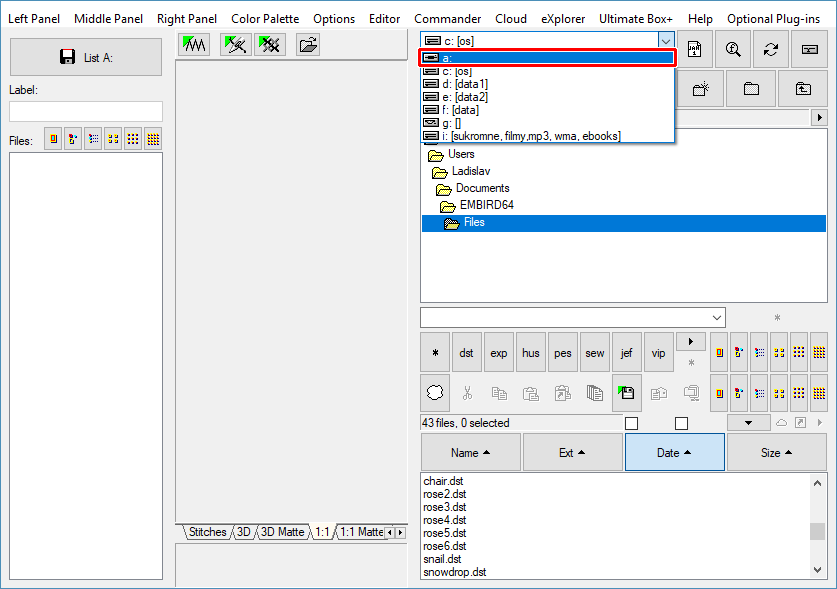
3 - Choose floppy disk drive in the right panel in "Drive:" box (Picture No. 1).
1. Choose floppy disk drive
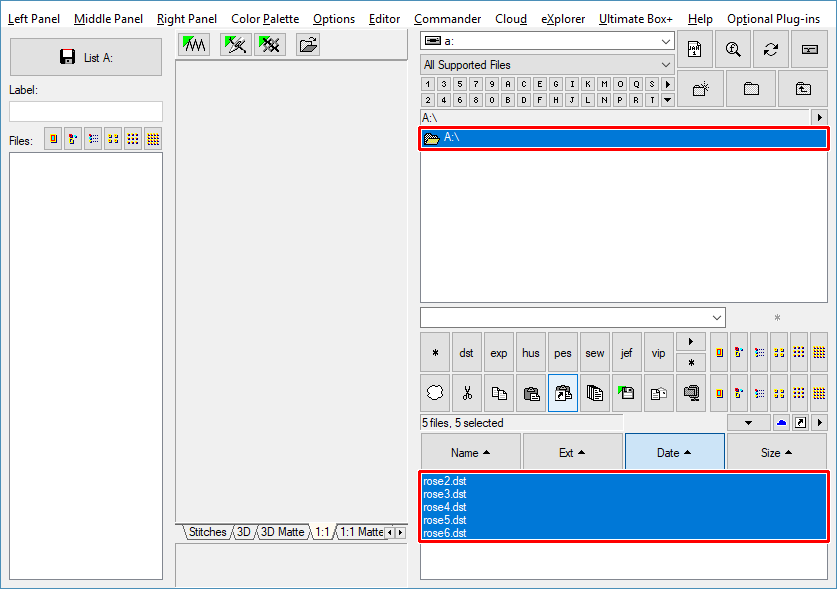
4 - In the "Files:" box at the right side of the screen select the design which you want to read from the floppy disk. To select a design, please move the mouse pointer to its file name and click the left mouse button (Picture No.2).
Note: You can select multiple files and read them all from the floppy disk at once. Please move mouse pointer to the file name of the first design in the "Files:" box at the right side of the screen, depress the left mouse button and hold it down while moving the mouse pointer over the file names of the other designs. When the mouse pointer is over the last design, please release the left mouse button.
2. Select floppy disk files
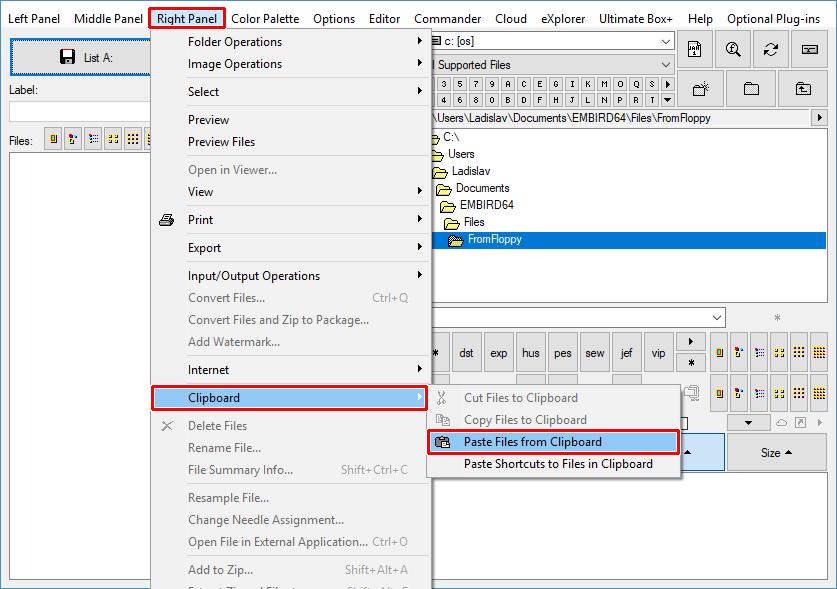
5 - Move mouse pointer to the "Files:" box in right panel and click right mouse button for popup menu. Choose "Clipboard > Copy Files to Clipboard" command to copy selected designs to the clipboard. You will find this command also in "Right Panel" menu (Picture No. 3).
3. Copy files to clipboard

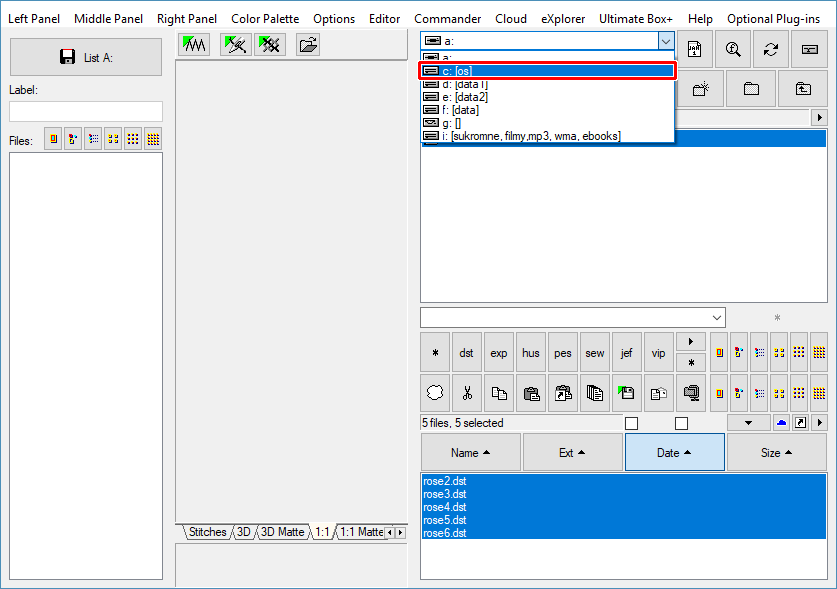
6 - Select hard disk drive in "Drive:" box in right panel (Picture No. 4). You can also choose the destination folder in "Folder:" box, into which the selected files from the floppy disk will be copied.
4. Select hard disk drive
7 - Move mouse pointer to the "Files" box in right panel and click right mouse button for popup menu. Choose "Clipboard > Paste Designs from Clipboard" command to copy the files from floppy disk to hard disk. You will find this command also in "Right Panel" menu (Picture No. 5).
5. Paste files from clipboard
8 - Embird will paste the files to the chosen drive and folder.
Writing Non-Standard Floppy Disks (e.g. Barudan, ZSK)
1 - Run Embird, it will start in "Manager" mode.
2 - Insert the floppy disk into the disk drive.
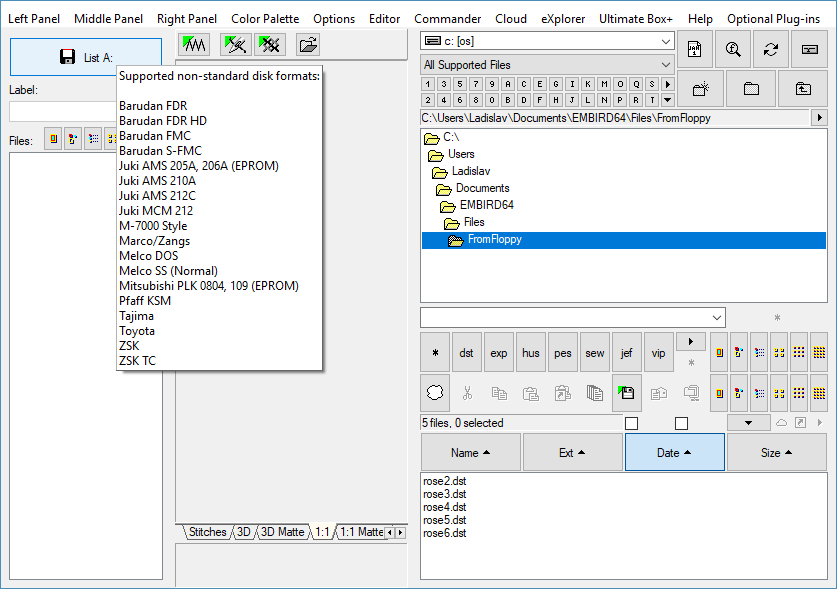
3 - Click "List A:" button and wait until Embird recognizes the floppy disk format (Picture No. 6).
Tip: The list of supported non-standard disk formats appears after a short while after moving the mouse pointer to he "List A:" button.
6. List of supported non-standard disk formats
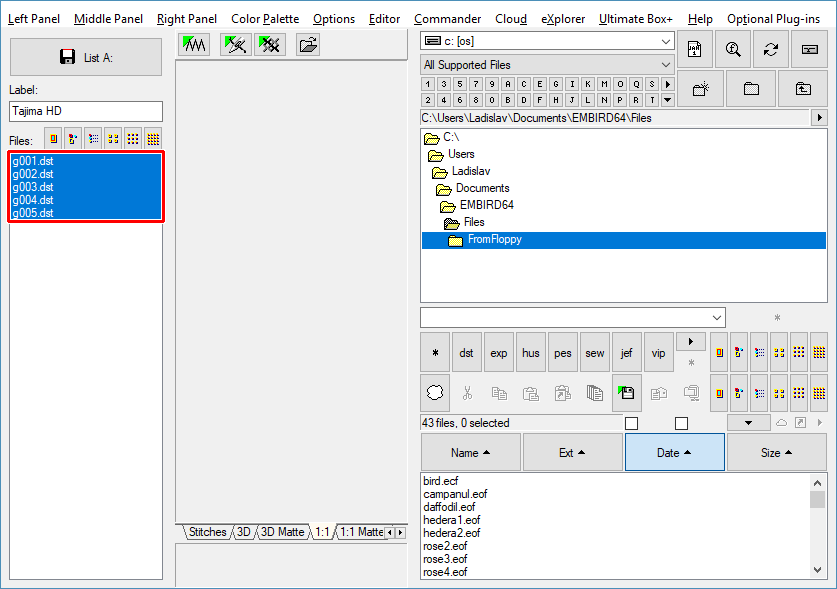
4 - You can see files stored on the floppy disk in the left panel in "Files:" box. Select files which you want to copy to the hard disk (Picture No. 7). To select the files, depress left mouse button and drag mouse over the filenames.
7. Select floppy disk files
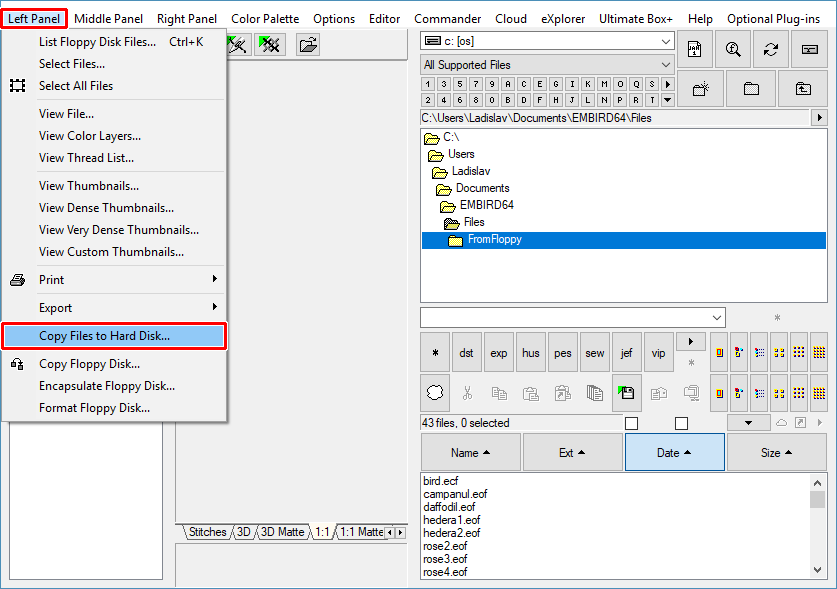
5 - Move mouse pointer to the "Files" box in left panel and click right mouse button for popup menu. Choose "Copy Files to Hard Disk" command. You will find this command also in "Left Panel" menu (Picture No. 8).
8. Copy files to hard disk
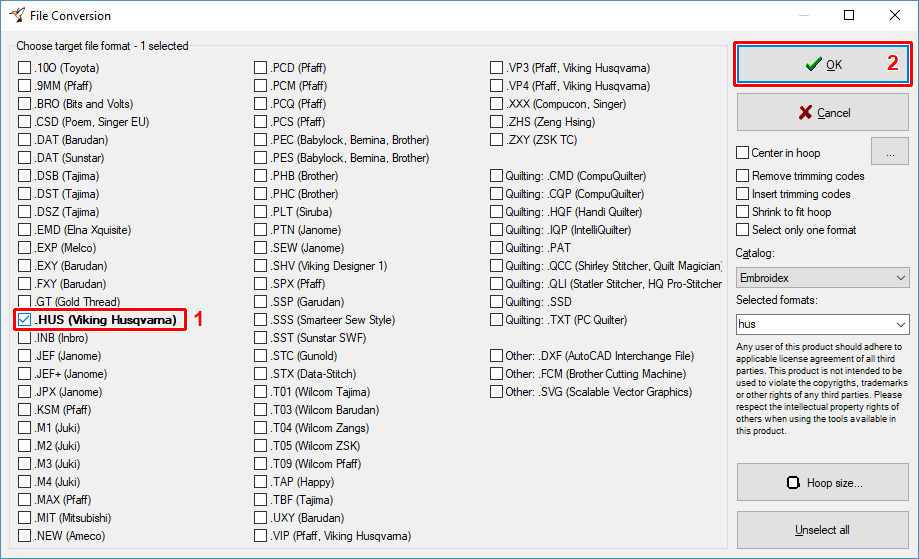
6 - Choose the target format and hit "OK" button to continue (Picture No. 9).
7 - Embird will read the files from the floppy disk, convert them 'on-the-fly' to chosen format and finally save them to hard disk to the actually chosen "Drive:" and "Folder:" in the right panel. Wait until this process is finished.
9. Choose target format(s)
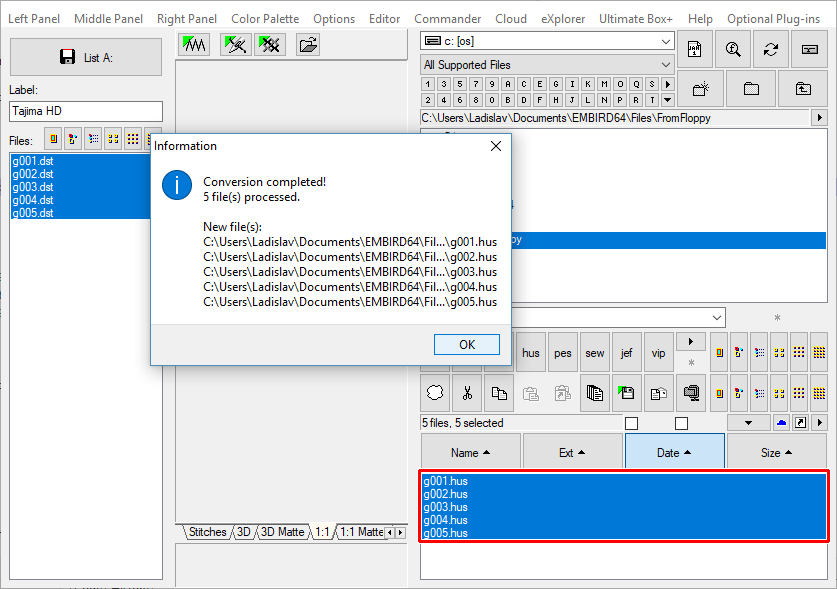
8 - Once the reading process is finished, a dialog box will appear on the screen, showing the result of the operation. You will see the files saved on the hard disk in the right panel in "Files:" box (Picture No. 10).
10. Operation result