Navigate
Products
Download
eShop
Upgrade
About
Training
Support

Navigate
Products
Download
eShop
Upgrade
About
Training
Support
This tutorial explains the Points Editing Mode of Embird Editor. It shows how to:
- Move a single or several stitch points,
- Add a new stitch point,
- Change the stitch type,
- Split the design on chosen stitch point.
Similar steps can be used for deleting of a single or several stitch points.
1 - Run Embird and click "Editor" menu to switch to Editor window.
2 - Select "File > Open" menu to open the design which you want to edit
3 - Click "Points Editing Mode" button or choose this mode using "Mode > Points Editing Mode" menu.
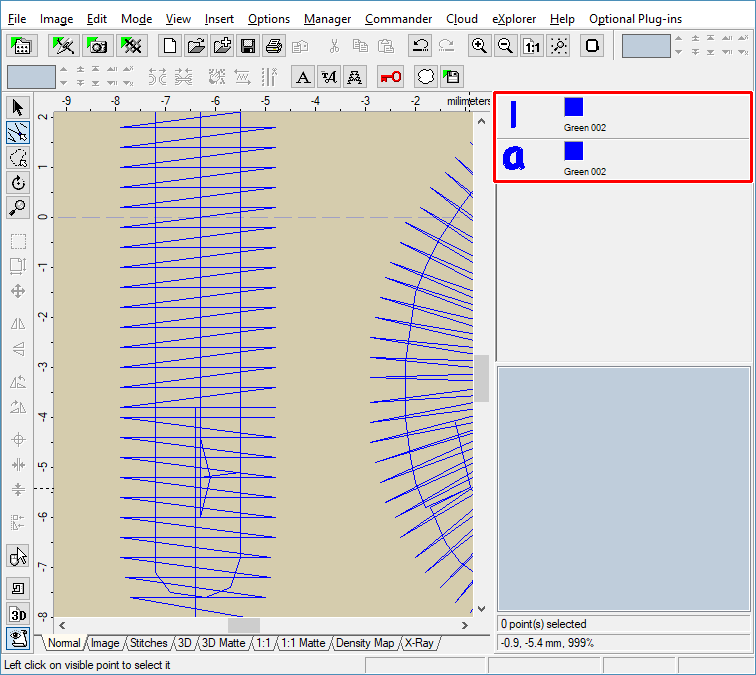
4 - Select the area of editing (Picture No. 1). Depress the left mouse button and drag mouse to select the area of editing by rectangle. Release the left mouse button once you have chosen the suitable area. In this example, we are going to edit some stitches in the top-left corner of the "a" character.
1. Select area of editing
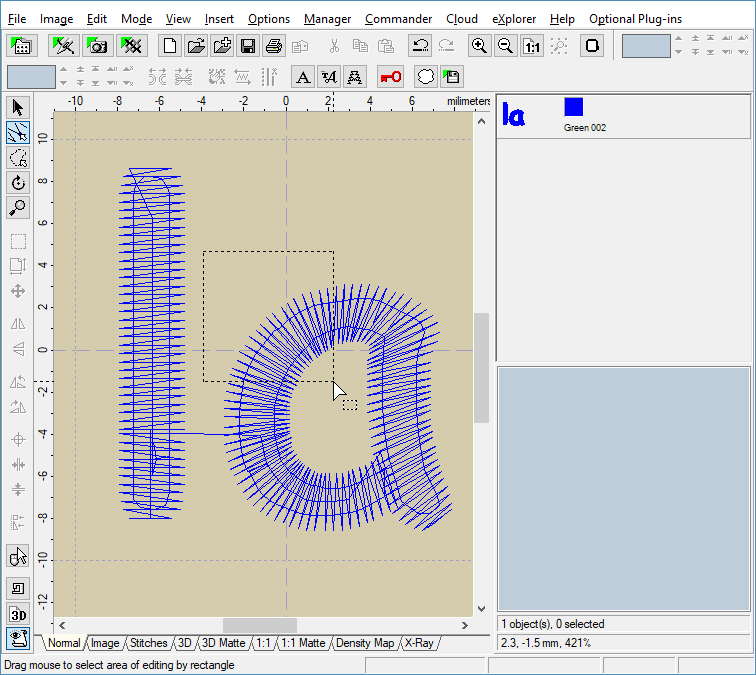
5 - Only those stitch points which lie inside the selection rectangle are accessible for editing. All the rest points are drawn in ghost color (Picture No. 2).
2. Area of editing
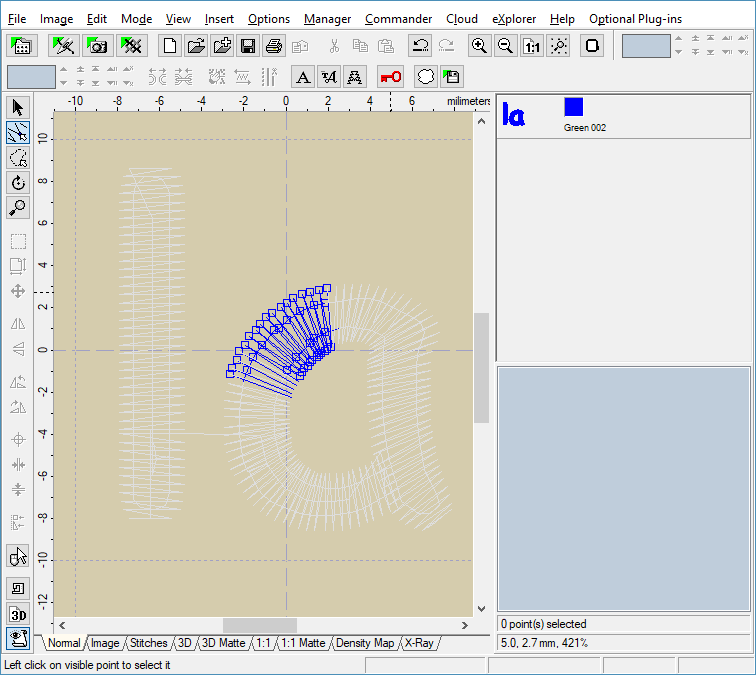
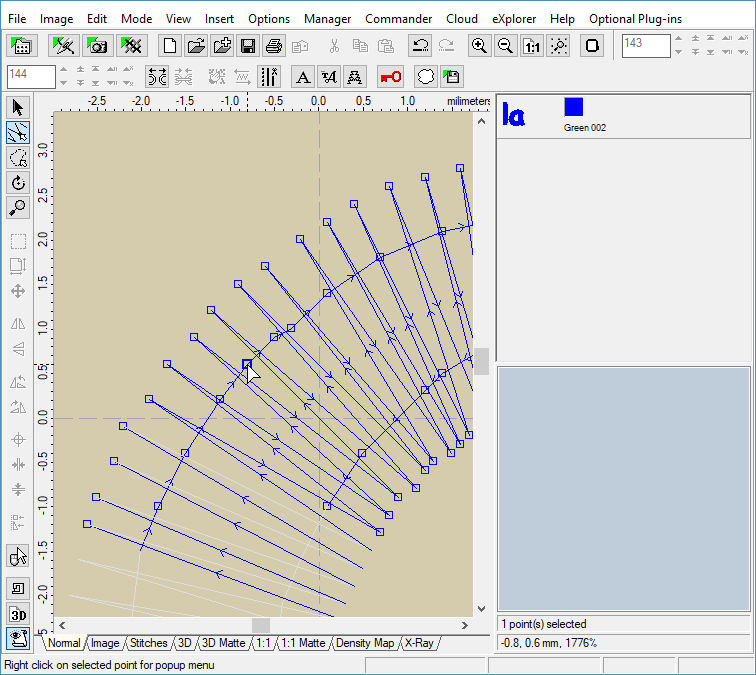
6 - Move mouse pointer to the handle square of some point, depress the left mouse button and drag mouse (while holding the left mouse button down) to move this point (Picture No. 3). The point being moved is selected - notice that it has thick handle square.
3. Move single point
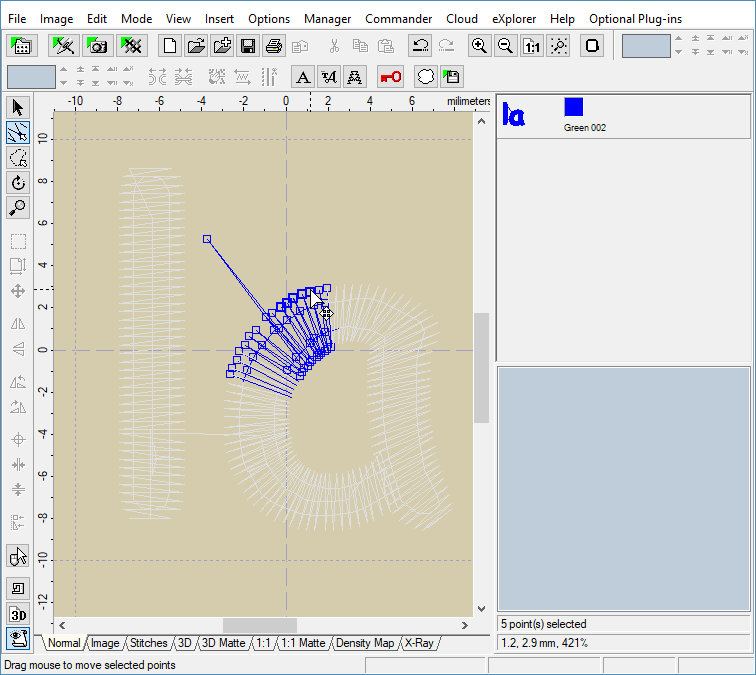
7 - If you want to move several points at once, you will have to select them first. Click left mouse button on the first point to select it. Then move mouse cursor to the second point, depress SHIFT key on the keyboard and click the point while holding the SHIFT key down. It will be added to the selection. Now you should have two points with thick handle square. Repeat this procedure for every point which you want to add to the selection.You can see the number of selected points at the bottom of "Objects Order Bar" at the right side of the screen (Picture No. 4).
4. Select multiple points
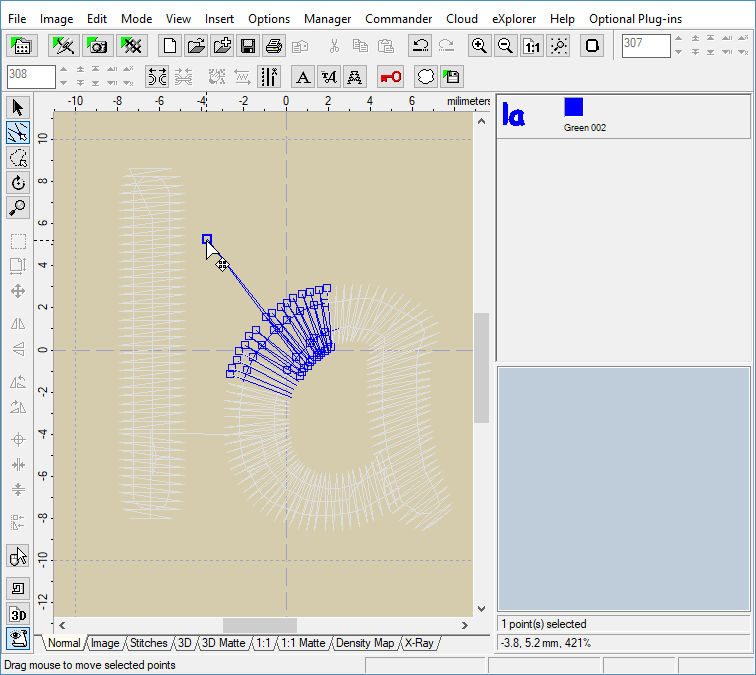
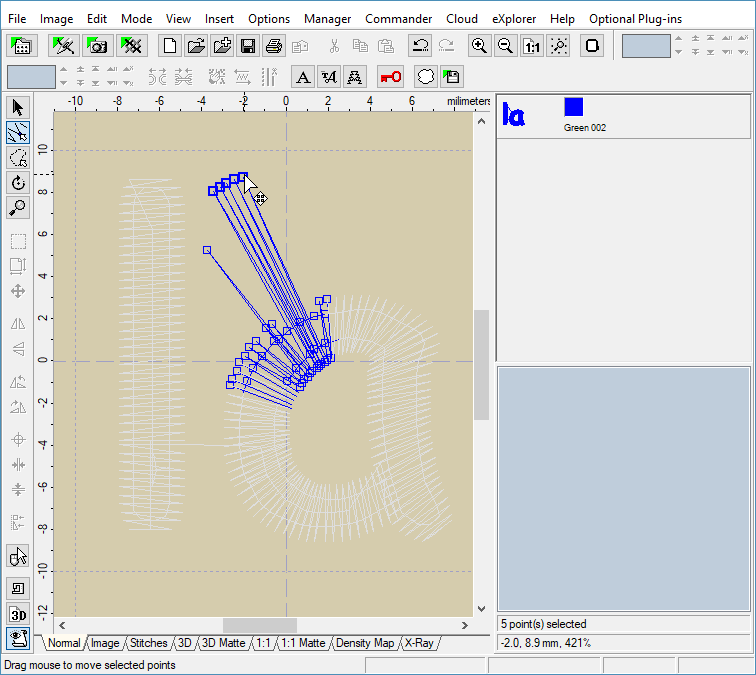
8 - Once you have selected several points, you can move them to the new position. Move mouse pointer to any of selected points, depress the left mouse button and drag mouse. Release left mouse button once you have moved the points to the new position (Picture No. 5).
5. Move multiple points
9 - You can add a new stitch point easily. The new point is always added AFTER the selected point. Therefore it is very useful to switch on the setting in "View > Stitch Direction" menu, so that you can see the stitch direction and select the right point (Picture No. 6).
6. Switch on "View > Stitch Direction" menu
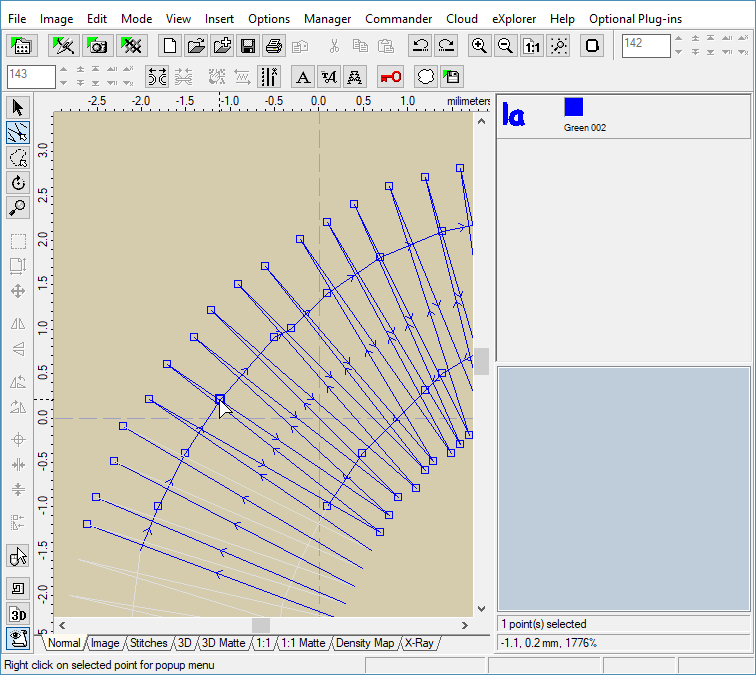
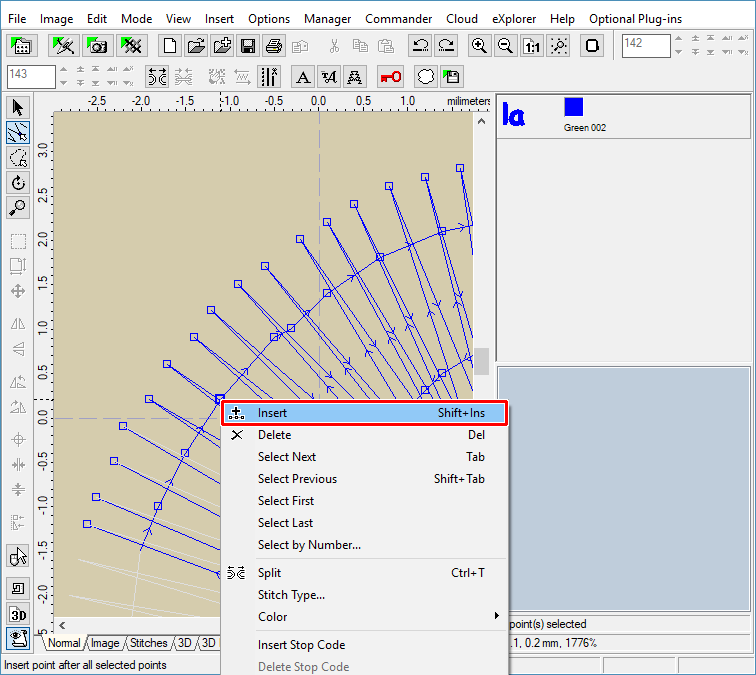
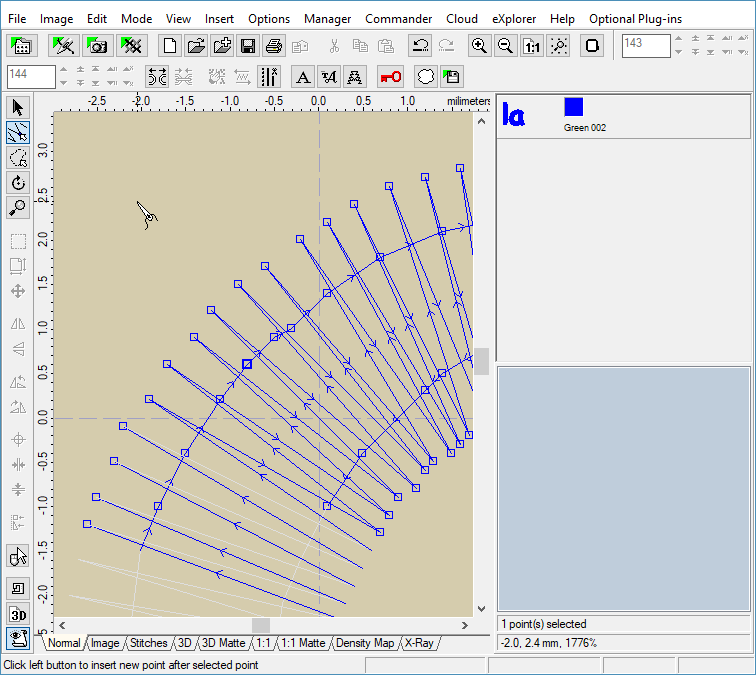
10 - Once you have selected the right point, move mouse pointer to this point and depress the right mouse button. A popup menu will appear on the screen (Picture No. 7). Choose "Insert" command from this menu. Another way of inserting new point is to depress "Shift" and "Ins" keys simultaneously after selecting the right point.
7. Insert new point
11 - A new point is created in the middle between selected and following point (see arrow in Picture no. 8). The new point becomes selected immediately, so that you can move it to other position if necessary.
Note: You can add several new points at once this way: Select several points first after which you would like to add the new points. Then use the same steps as shown above.
8. New point inserted
12 - There exists another way of adding new points: You can add them "freehand", directly to the right position. Select the point after which you would like to add the new point. Then move mouse pointer to the position where you would like to place the new point. Depress CTRL key on the keyboard and click the left mouse button while holding the CTRL key down (Picture No. 9).
9. Add new point "freehand"
13 - A new point is created and placed on the chosen position (Picture No. 10). The new point becomes selected immediately, so that you can move it to another position if necessary.
10. New point added

14 - Points Editing Mode allows you to change the stitch type easily. Stitch type always relates to the stitch BEFORE selected point. In the example below, we want to change the connection stitch between characters to floating stitch (jump), because now it is running stitch. Select the end point of connection stitch and then click the right mouse button for popup menu (Picture No. 11). Choose "Change to Floating Stitch" command from this menu.
11. Change stitch type

15 - Now you can see that the stitch type have changed to floating (jump) (Picture No. 12).Floating stitches are drawn by dashed line in Embird.
12. Selected stitch changed to jump
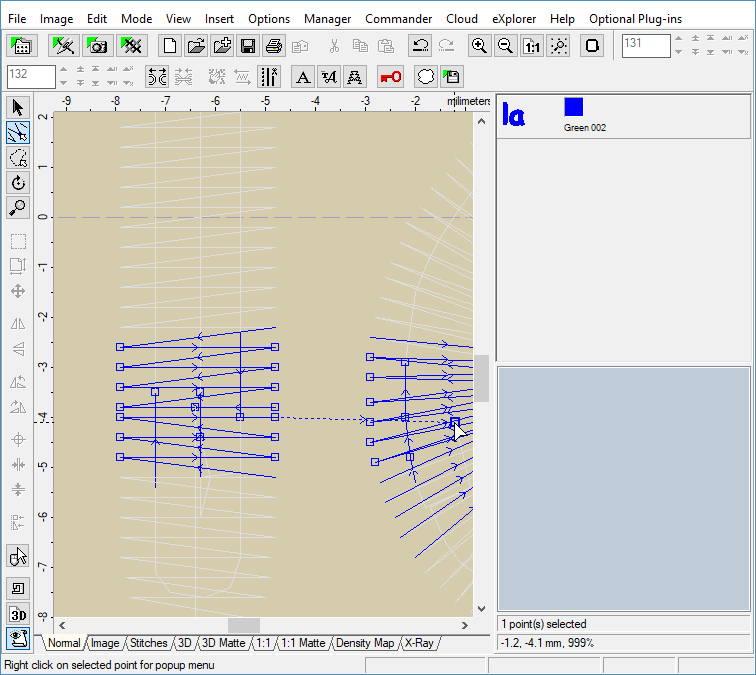
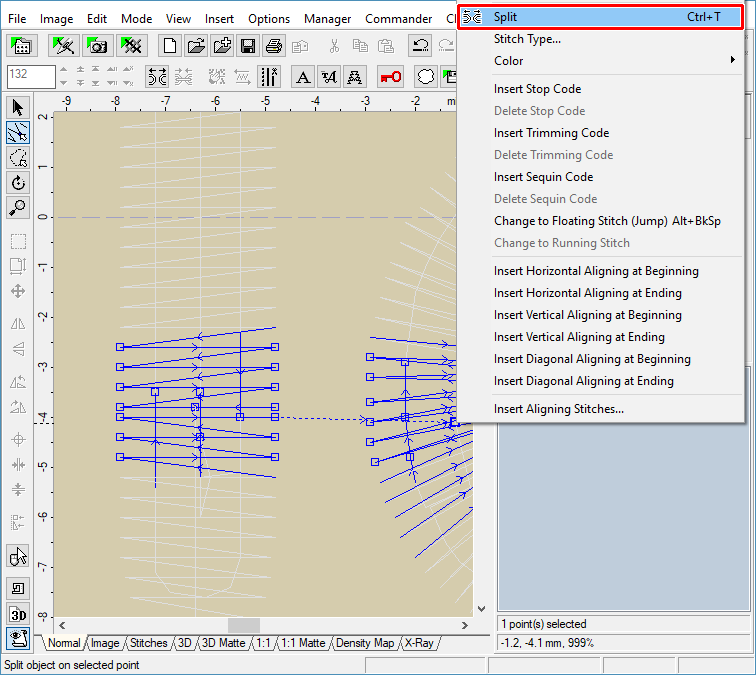
16 - Another feature of Points Editing Mode is that you can split the design on chosen point. In the example below, we want to separate the characters - split the design on connection stitch. Select the end point of connection stitch first. Then click the right mouse button for popup menu. Finally, choose "Split" command from this menu (Picture No. 13).
13. Split design on chosen point
17 - The design was split on the selected point (Picture No. 14). Now we have two objects in Editor, you can see their icons in "Objects Order Bar" at the right side of the screen.
14. Design split to two parts