Navigate
Products
Download
eShop
Upgrade
About
Training
Support

Navigate
Products
Download
eShop
Upgrade
About
Training
Support
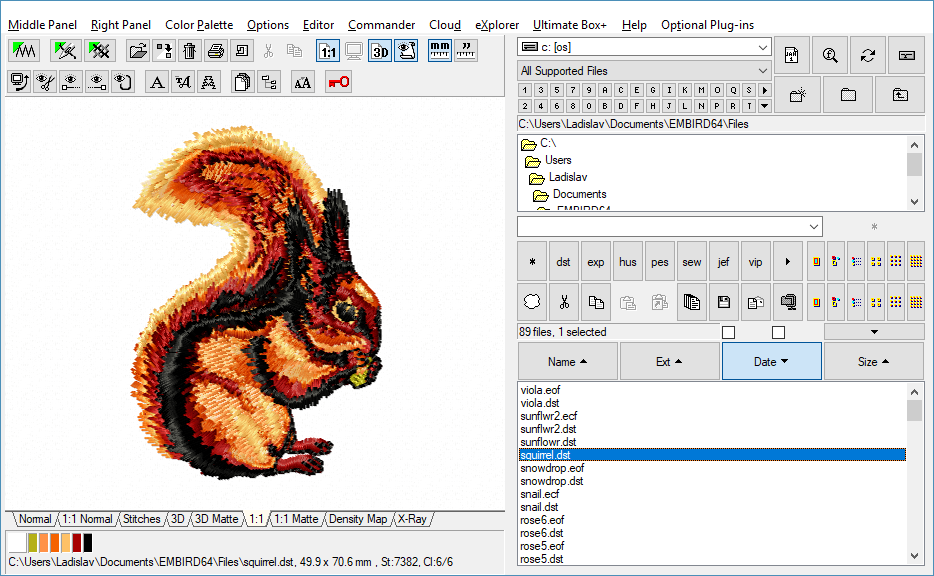
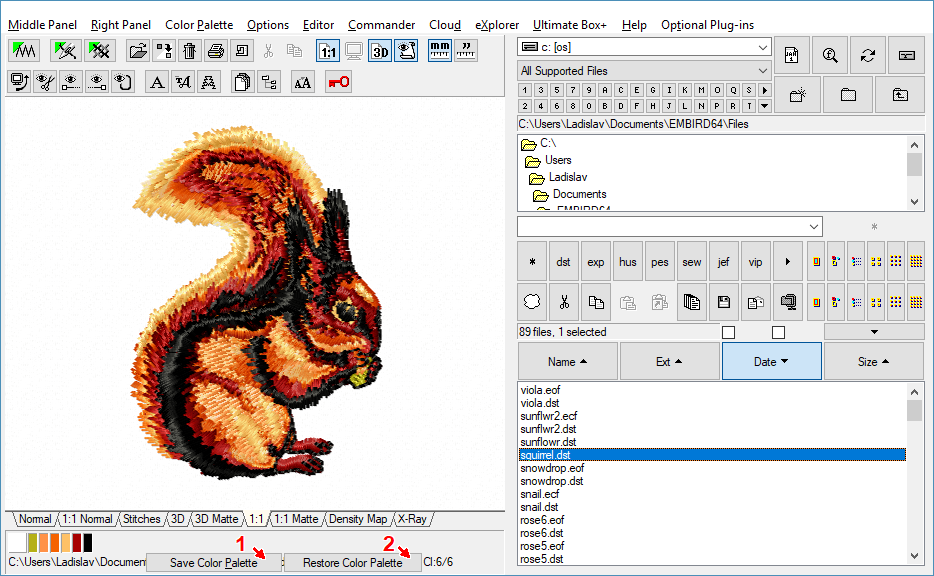
1 - Run "Embird", it will start in "Manager" mode.
2 - Use "Drive", "Folder" and "Files" boxes (located on the Right Panel at the right side of the screen) and choose the folder with embroidery designs.
3 - Double click the file name of the design which you want to display. It will appear on the preview area. Below this area there is a bar which contains boxes with design colors.
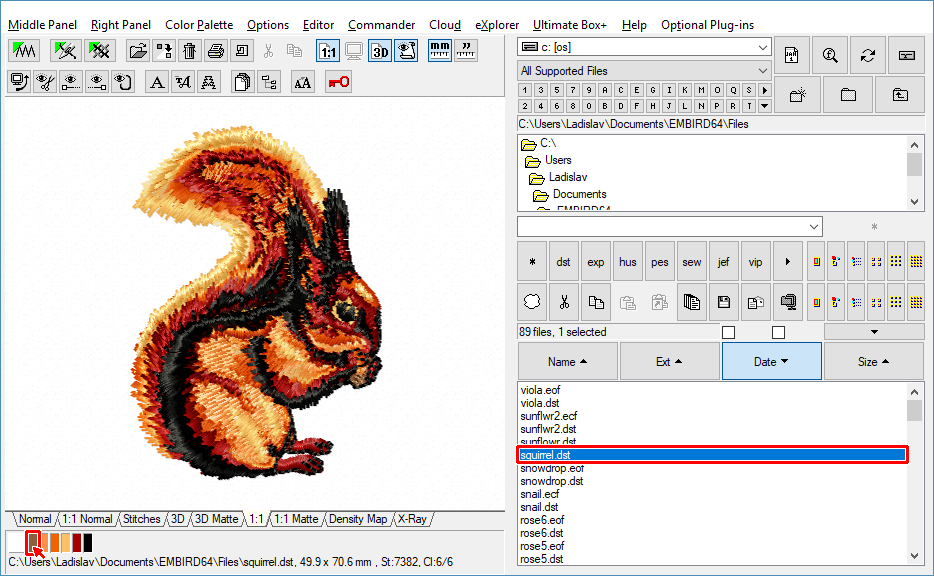
4 - Move mouse pointer to the box containing color which you want to change and double click the left mouse button. (Picture No.1).
1. Double-click the color box
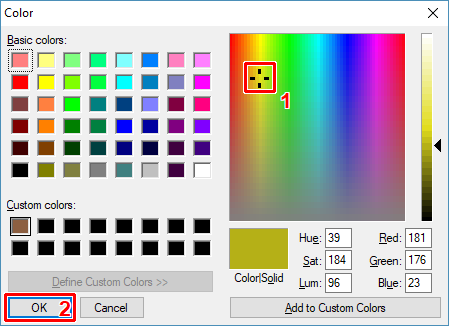
5 - You can select the new color in the dialog box which appears on the screen. There are several possibilities how to choose the new color: Either from the "Basic color" boxes (at the left side of the screen), in "Color spectrum" box (in the middle of the screen) or from "Color bar" (at the right side of the screen). There is also possibility to type numbers into "Red, Green, Blue" boxes if you want to choose color with known R, G, B.
6 - After choosing your new color, click "Add to Custom Colors" button. The new color appears in "Custom colors" box (Picture No. 2). Then click "OK" button to confirm the selection.
2. Choose new color
7 - The new color will appear in the box, but not in the design. The color changes must be applied - click the "Apply Color Changes" button located below color boxes (Picture No. 3).
3. Apply Color Changes
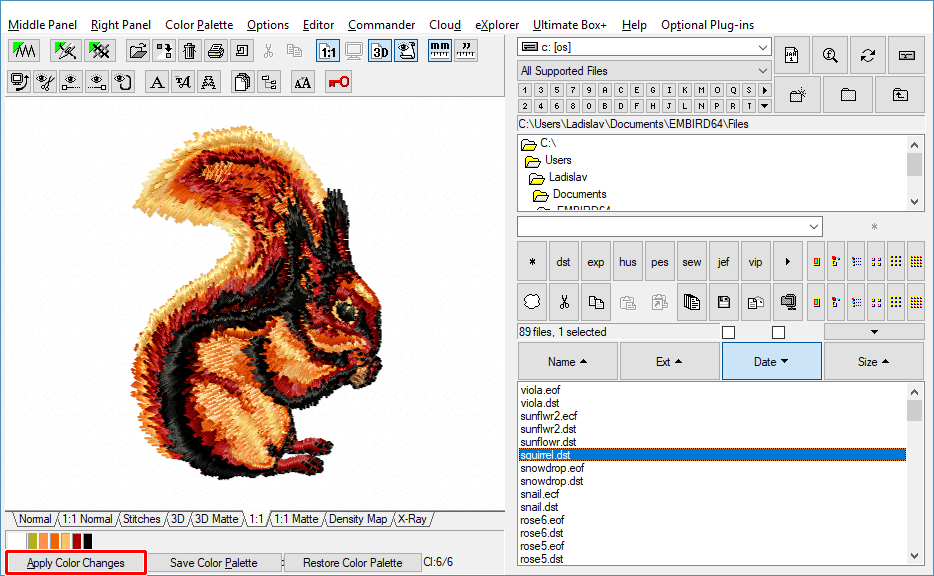
8 - Now, you should see differences between the design with previous color (Picture No. 1) and new color (Picture No. 4). The brown color of squirrel's cob has changed to the yellow one.
9 - Repeat steps 4 ~ 7 if you want to change an other design color or color of the background.
10 - The color changes are not permanent unless you save the new color palette. If you want to discard the color changes and restore previous colors, click "Restore Color Palette" button.
11 - Click "Save Color Palette" button if you want to save the new color palette (Picture No. 4).
4. Save Color Palette
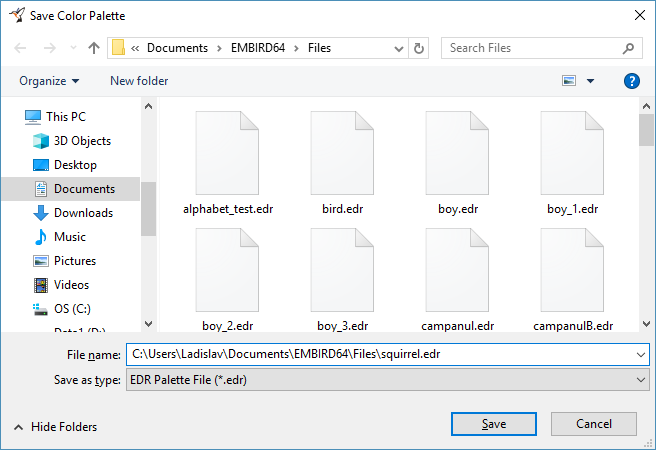
12 - Specify the folder and the file name of the palette file in the dialog box which appears on the screen (Picture No. 5). It is recommended to save the color palette to the same folder and with the same file name as corresponding design, just change the extension to .EDR.
Note: Tajima DST file cannot store the color palette, this palette must be saved into a separate file. So, we added a support for a file with the .EDR extension. If you have the SQUIRREL.DST file and save the color palette, it will be stored in the SQUIRREL.EDR file (unless you change its name). The option in "Options > Settings > Support Palette Files" menu must be ON, otherwise the .EDR files are not taken into account by Embird. Open "Help > Contents > Color Palette Menu" for more information about .EDR extension.
5. Choose Palette Filename
13 - After saving, when you double click on the file name of the design (SQUIRREL.DST), it will be displayed with the new color palette (Picture No. 6).
6. Design with new color