
Navigate
Products
Download
eShop
Upgrade
About
Training
Support

Navigate
Products
Download
eShop
Upgrade
About
Training
Support
This tutorial explains how to use the Font Engine plug-in for Embird. This plug-in allows you to create lettering from TrueType and Open Type fonts, i.e. from fonts installed in your Windows system. You can even use fonts, which are not installed (to save system resources); find more information in the Font Engine Plug-in - Using 'Not Installed' Fonts tutorial. In Font Engine, it is possible to create lettering with satin (auto-column), plain and motif fills and with thin, satin and applique outlines.
Note: If you want to use Font Engine, there is no special file to download and install. Font Engine plug-in is installed together with Embird software. However, you must pay for it if you want to use it. In other words, the registration fee for Embird does not cover the registration of Font Engine plug-in.
Note: There are no TrueType nor Open Type fonts included in Font Engine. Font Engine is just engine, which is capable of converting these fonts into stitches.
Read the following tutorial to find out how to create lettering in Font Engine:
1 - Run Embird and click "Editor" menu to switch to Editor window.
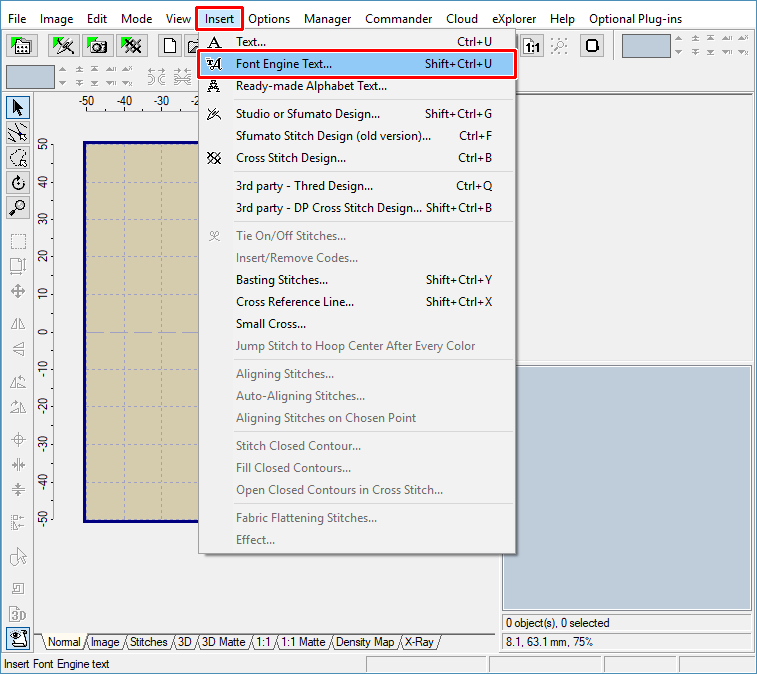
2 - Select "Insert > Font Engine Text" menu to create lettering from TrueType or Open Type fonts (Picture No. 1).
1. Select "Insert > Font Engine Text" menu
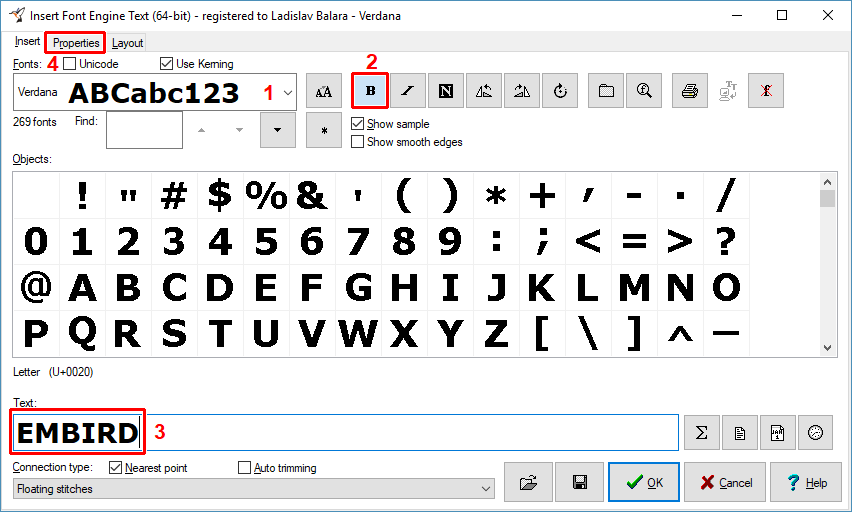
3 - Font Engine dialog box will appear on the screen (Picture No. 2). In the "Fonts" box you can choose the font which will be used for characters. The "Unicode" check box located above the "Fonts" box allows to switch between "normal" character sets and "Unicode" character sets (used usually for Japanese and Chinese complex fonts). At the right side of the "Fonts" box, you can modify other font properties: Click "B" for bold font and/or "I " for italic effect. After choosing the font, you can type your text into the "Text" box at the bottom of the "Insert" tab.
2. Font Engine window - Insert tab
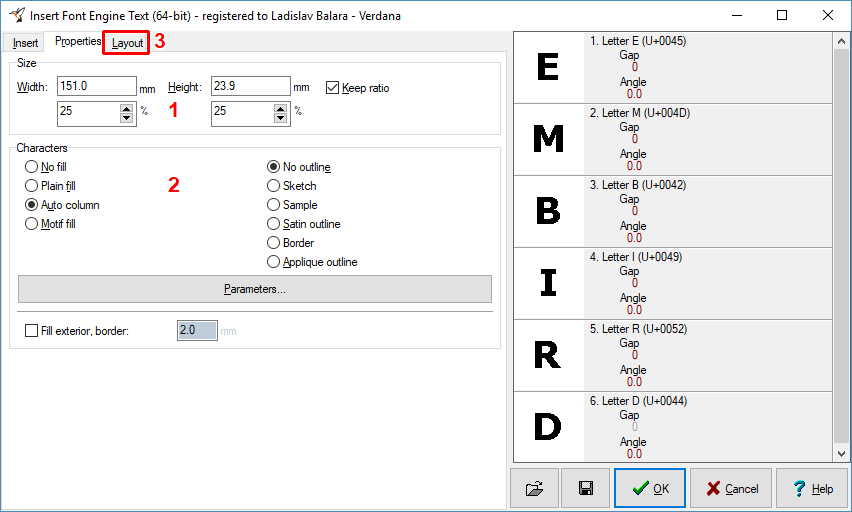
4 - Click the "Properties" tab to change the size, fill type, outline type, and other properties of lettering (Picture No. 3). If you want to change more fill and outline parameters, click "Parameters" button.
3. Font Engine window - Properties tab
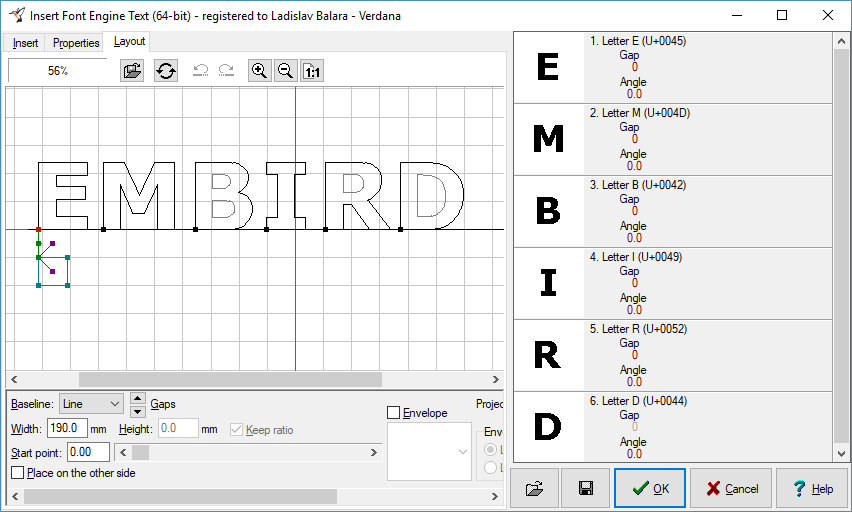
5 - Click the "Layout" tab to change the layout parameters of your lettering (Picture No. 4). For example, you can change the baseline, place the text on the other side of baseline, create bridge effect by choosing an "Envelope" style, etc.
Note:
There are several points shown on the layout area, allowing you the following:
A. Use red points to move the character along the baseline.
Depress CTRL key to move only selected character; otherwise, all characters placed after selected character will move.
B. Use green points to rotate the character.
Depress CTRL key to change the angle by 15 degrees.
Depress ALT key to set the angle to 0 degrees.
C. Use teal points to resize the character, either horizontally or vertically.
Depress CTRL key to change the size in larger steps.
Depress ALT key to maintain the aspect ratio of width and height.
D. Use purple points to skew or mirror the character, either horizontally or vertically.
Depress CTRL key to skew in larger steps.
Depress ALT key to mirror the selected letter.
Depress SHIFT key while moving the point to apply the operation to all characters.
Please note that undo/redo/reset operations are available for changes in Layout; use the buttons located below layout area.
4. Font Engine window - Layout tab
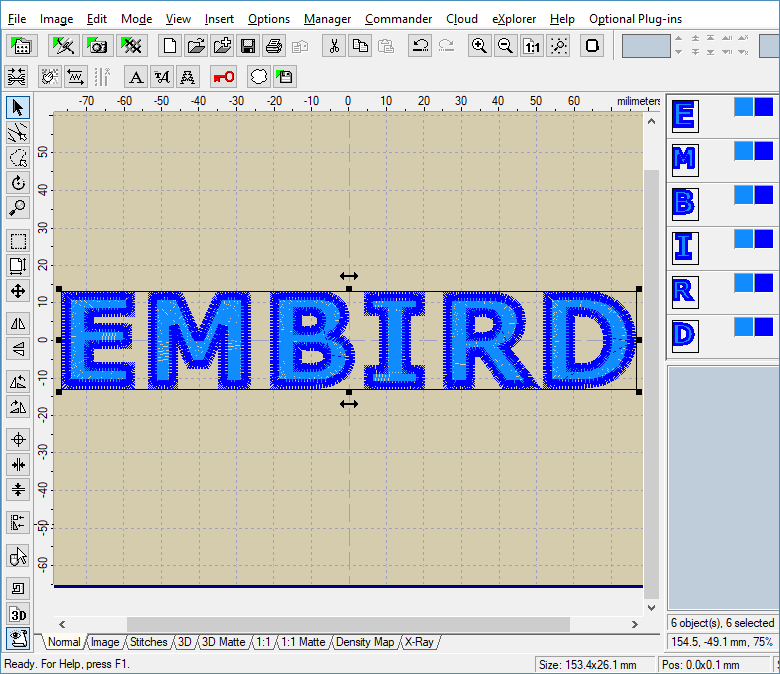
6 - Finally, click "OK" button to create the lettering and insert it into Editor window (Picture No. 5).
5. Inserted text
7 - Use "File > Save As" command to save the whole design to a file on your disk. Specify the format and the file name of the new design in the dialog boxes which appear on the screen.