
Navigate
Products
Download
eShop
Upgrade
About
Training
Support

Navigate
Products
Download
eShop
Upgrade
About
Training
Support
Step 1 - Downloading Embird
1 - Run your internet browser and open the download page of Embird software (https://www.embird.com/download.htm).
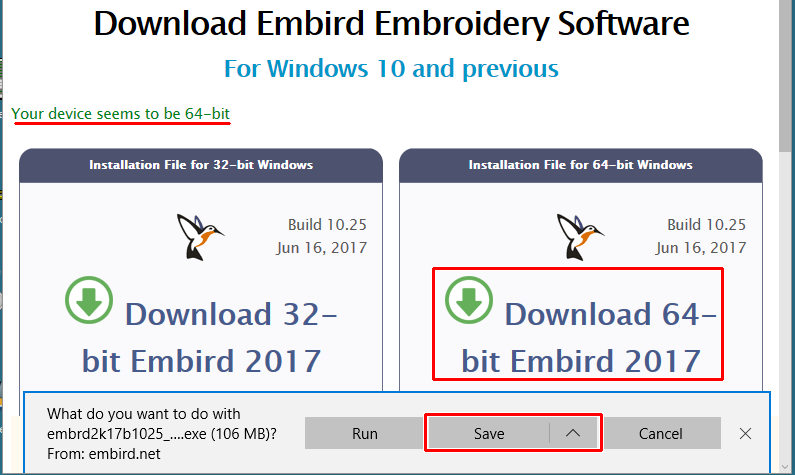
2 - When this page is loaded, click the proper version of the Embird to download installation files of Embird to your computer (Picture no. 1).
Picture No. 1
3 - Wait until the downloading process is finished. Finish of the downloading is indicated by the Running security scan and displaying of the scanning result.
4 - Check if downloaded file is safe. It is recommended to do it at https://www.virustotal.com/#/home/upload where downloaded file is checked by many antivirus programs. Checking by the single antivirus program installed on your computer may be false positive (a safe file is marked as unsafe) or false negative (an unsafe file is not recognized).
Step 2 - Embird Installation
5 - To install Embird on your computer run the saved installation file in Windows: Select Windows-> File Explorer -> Downloads, select installation file of Embird, hit right button and select Run as Administrator.
6 - The installation process will start and the Embird setup window will appear on the screen. Follow the steps displayed in this window to install Embird on your computer.
7 - When the installation process is finished, the "Installation was successful" message will appear on the screen and the icon for launching of Embird will appear on your desktop.
Step 3 - Testing Embird
8 - Unless you have already inserted the password into Embird, it will run in demo (evaluation) mode. Demo of Embird is fully functional 30 days or 100 runs, whatever comes first. You have a lot of time to find out whether Embird meets all your needs or not.After this period, you will have to insert the registration password into Embird to turn it into full version, otherwise the demo will expire.
You can test all features Embird also when the demo is expired (i.e. after 30 days or 100 runs after installation), but only with our free designs stored in the "C:\Program Files (x86)\EMBIRD32\FILES" folder (or in "C:\Program Files\EMBIRD64\FILES" folder if you are using 64 bits version of Embird ) on your hard disk.
Step 4 - Testing Embird Plug-ins
9 - All Embird plug ins are installed together with the basic Embird.
Demo versions of all Embird plug-ins are functional also with demo version of Embird basic software. In other words, it is not necessary to register Embird basic software to test the plug-ins.
Step 5 - Registration of Embird and its plug-ins
Please be sure before registration that you tested Embird and its plug-ins and you have found out that they meet your needs. Be aware that there is no refund on registered Embird and/or plug-ins.
You will receive the passwords in e-mail after purchasing Embird and/or plug-ins at https://www.embird.com/sw/embird/register.htm within one working day.
Note: There are no special installation files for registered users. Demo (evaluation) version of main program and plug-ins will change into the full versions after inserting the registration password. In other words, there is only single installation file for Embird, which runs in demo mode until you insert the passwords and unlock it for running in full mode.